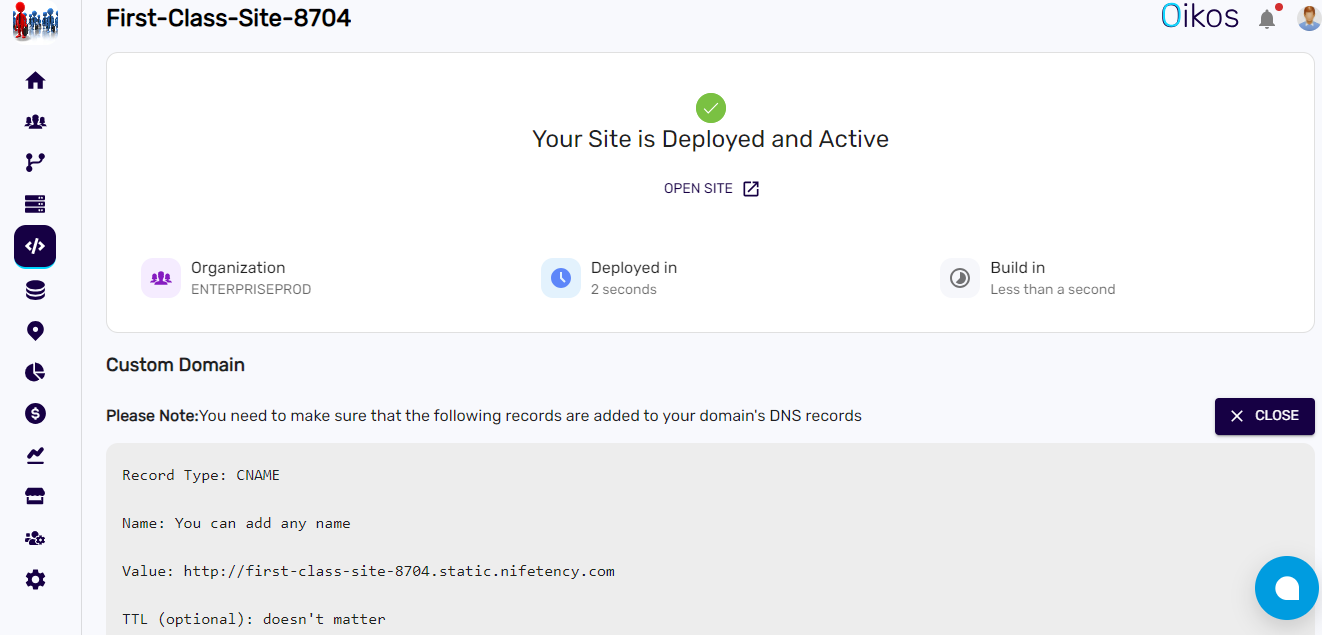
Build file deployment
Effortlessly deploy your website by uploading a build file generated with npm run build.
To deploy your website using a build file, follow these steps:#
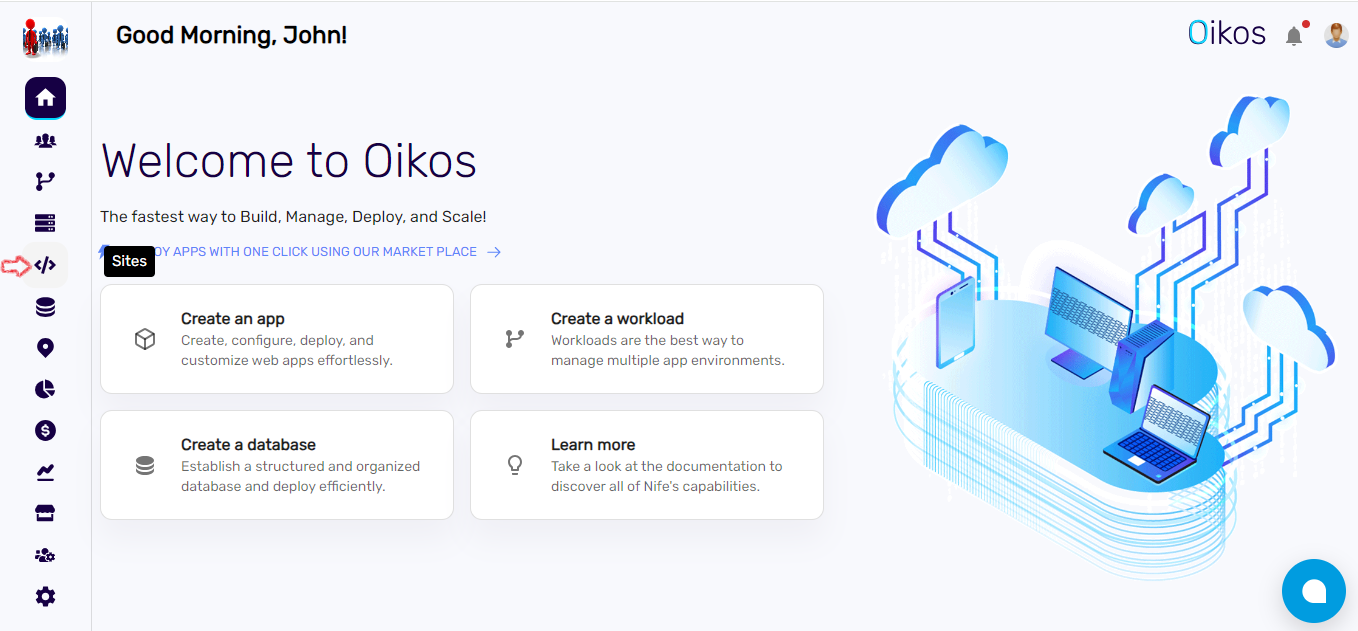
1. Navigate to the Dashboard:#
- From the sidebar menu, click on "Site."
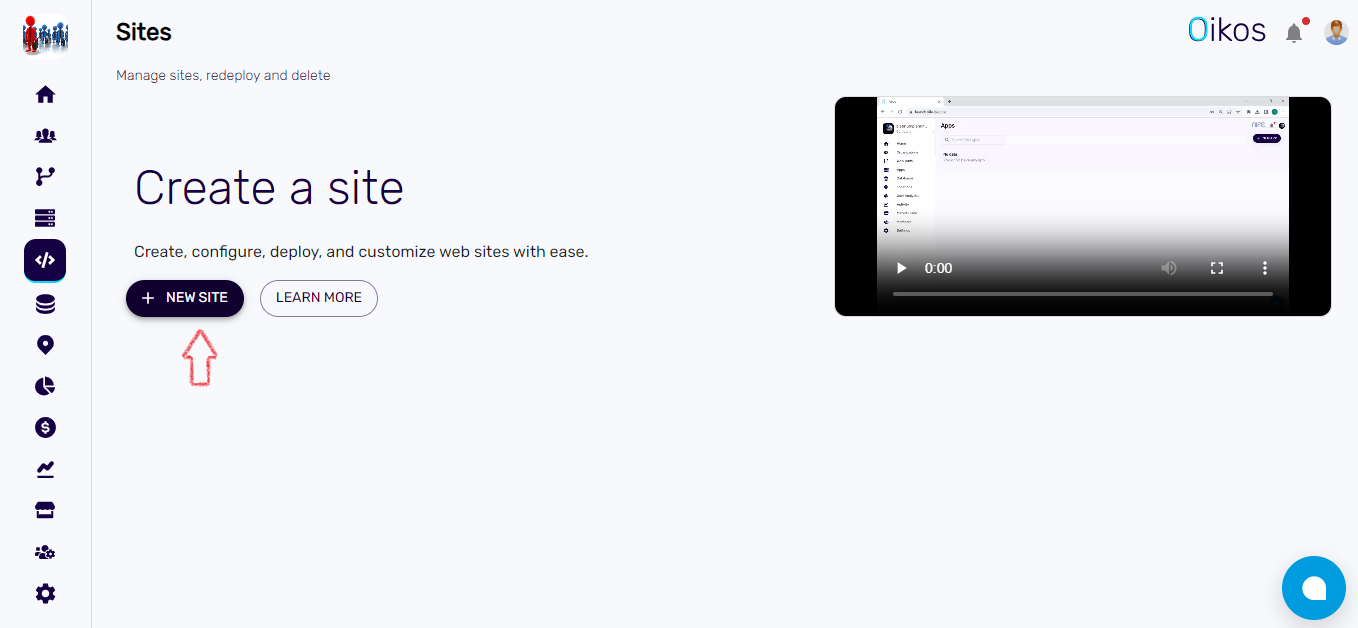
2. Create a New Site:#
- Click on "+ New site."
3. Choose Organization:#
- Select the organization where you want to deploy the website.
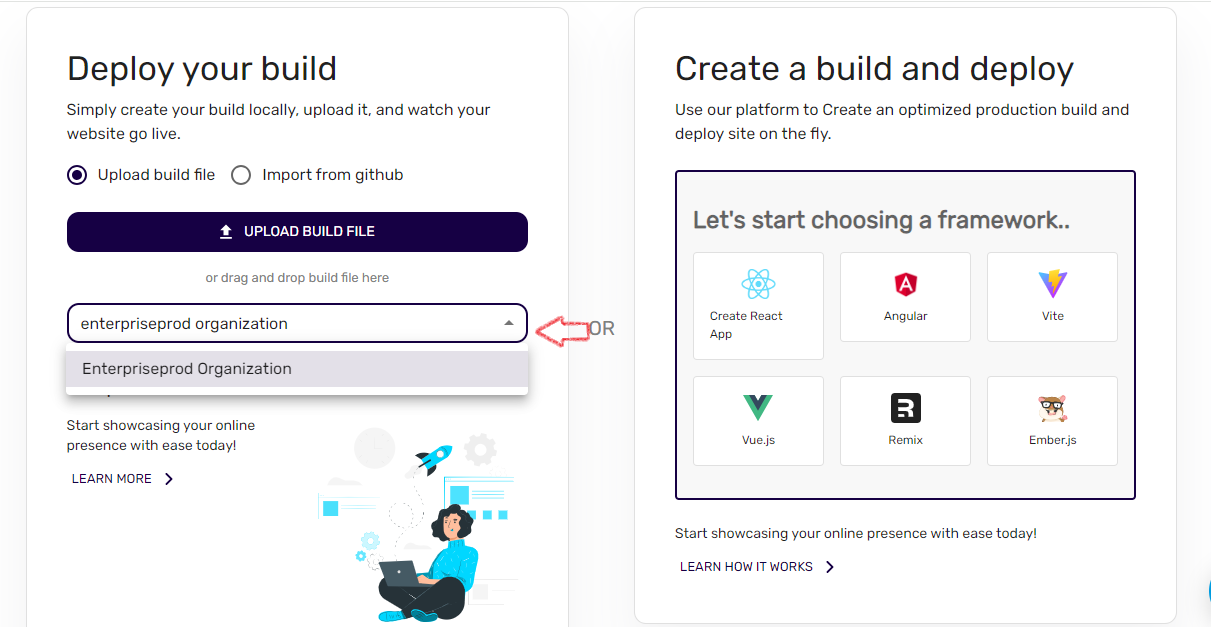
4. Deploy your build:#
- Upload build file: If you choose to upload from your local device, ensure that you have the build file in .zip format ready to upload.
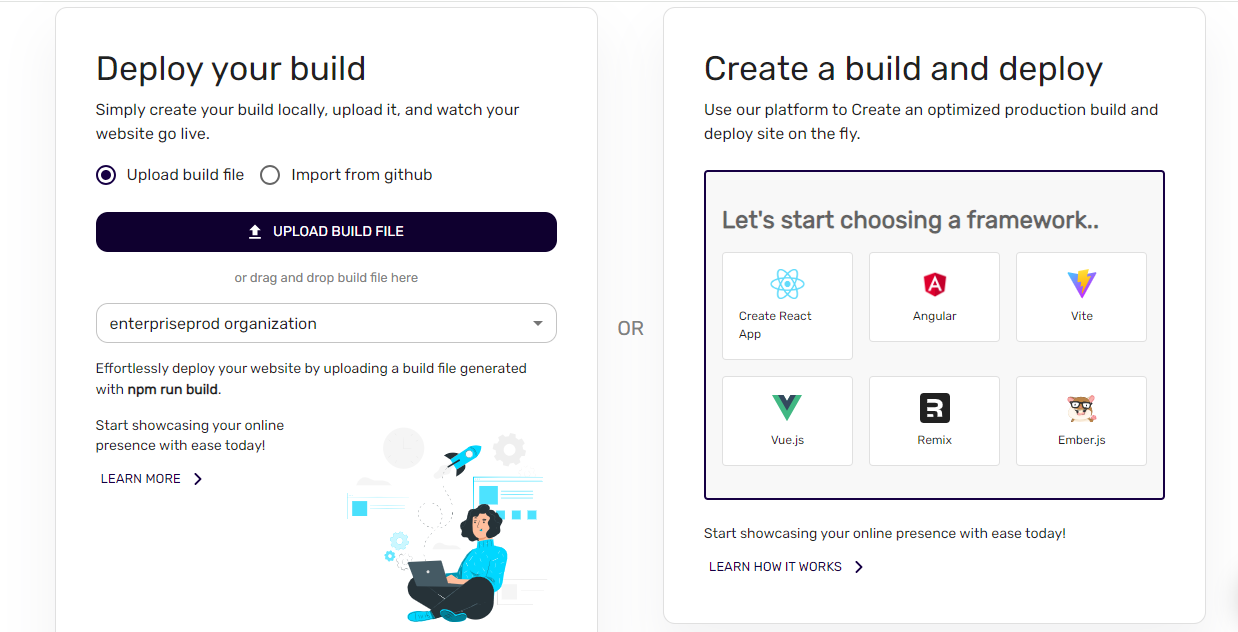
Import from github : + if you prefer to import from GitHub, the repository should contain only the build files necessary for deployment and you will need to provide the repository link and branch name. + Please note that currently, we support only public repositories.
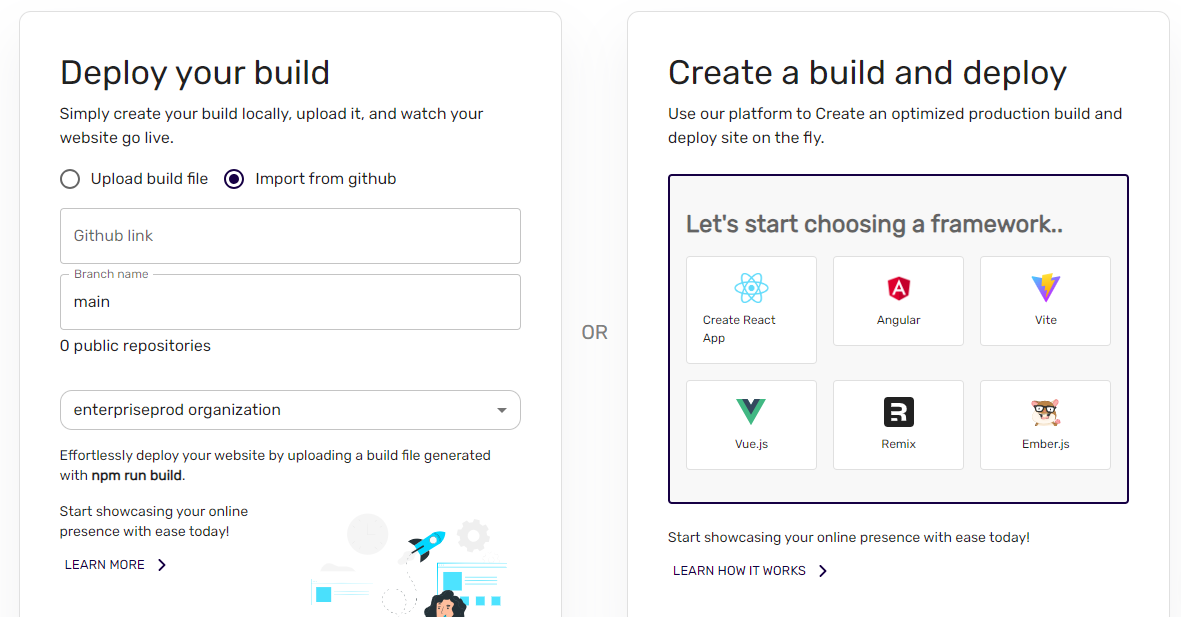
5. Deploy#
- Once the zip file is uploaded or Imported from GitHub , the application will automatically deploy your website.
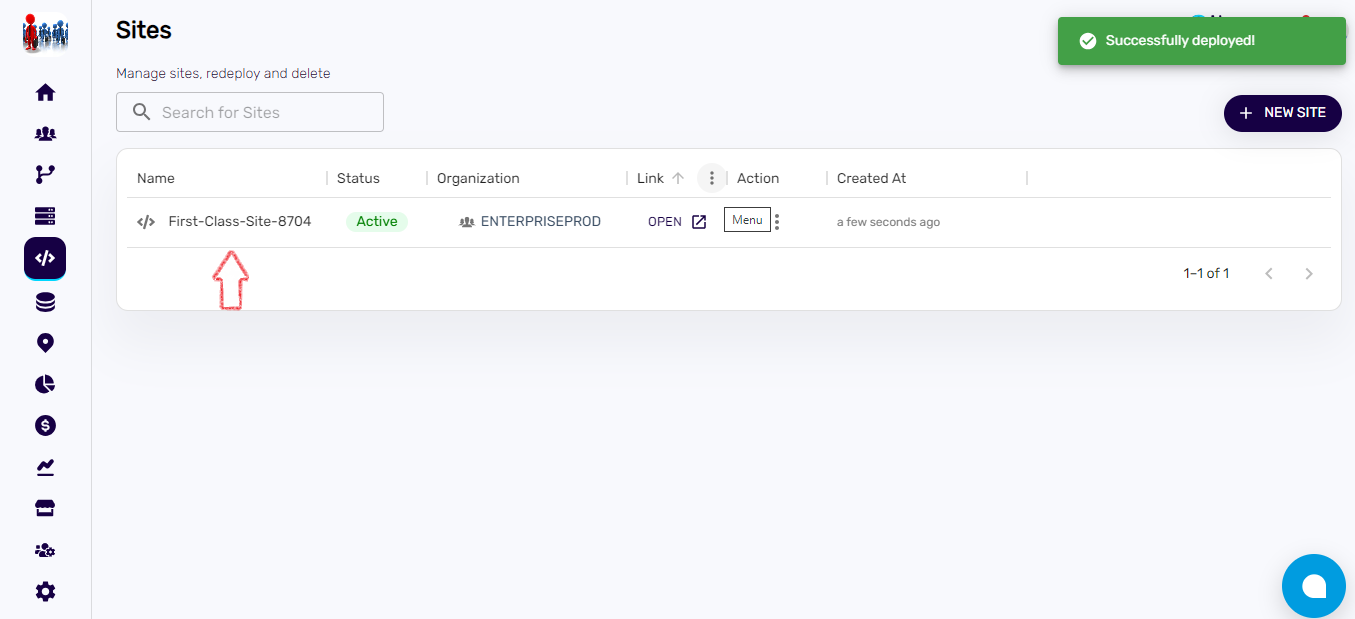
6. After Deployment#
- Once the deployment process is complete, click on the Name of application to view its details.
- Click on "Open Site" to visit your website and verify the deployment.
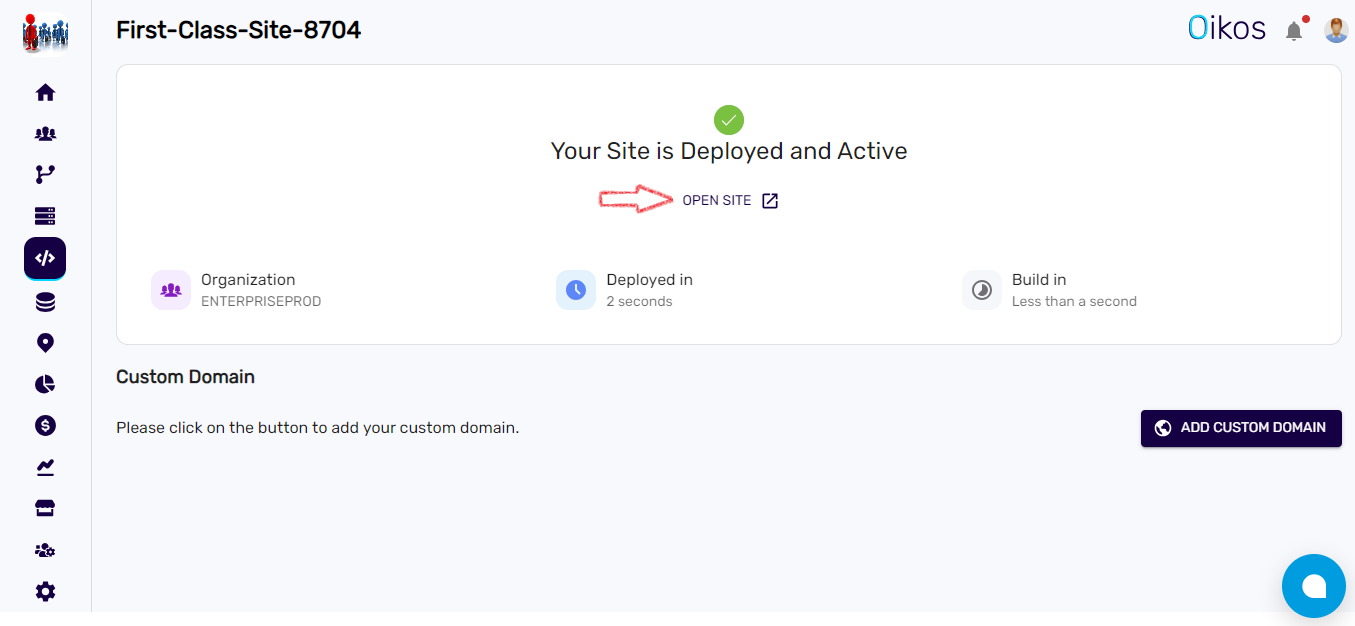
7. Custom-Domain Option#
- Below the application details, you'll find the custom domain option. Click on that option to access the link where you can map your domain to the deployed website.
