Create a build and deploy
To Create an optimized production build and deploy, follow these steps:#
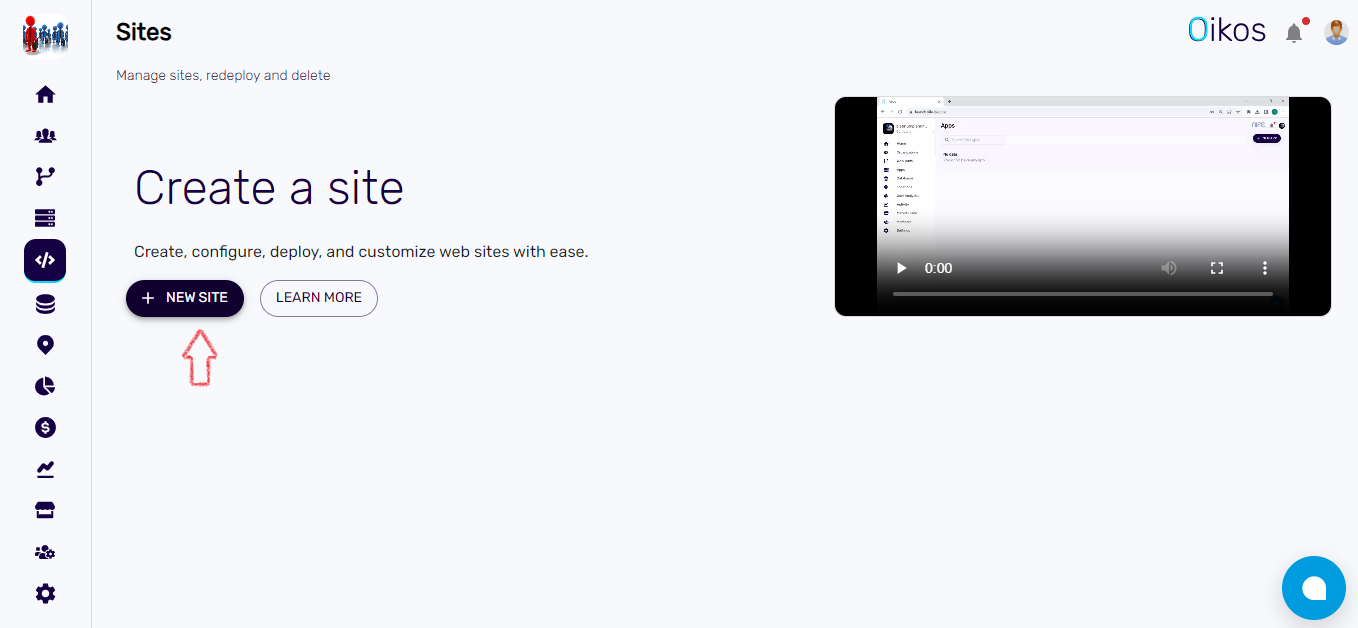
1. Navigate to the Dashboard:#
- From the sidebar menu, click on "Site."

2. Create a New Site:#
- Click on
+ New site
On the right side, you can see options to select the framework. Currently, we support:
React
Angular
Vite
Vue.js
Remix
Ember.js
Click on the framework that your source code is based on.
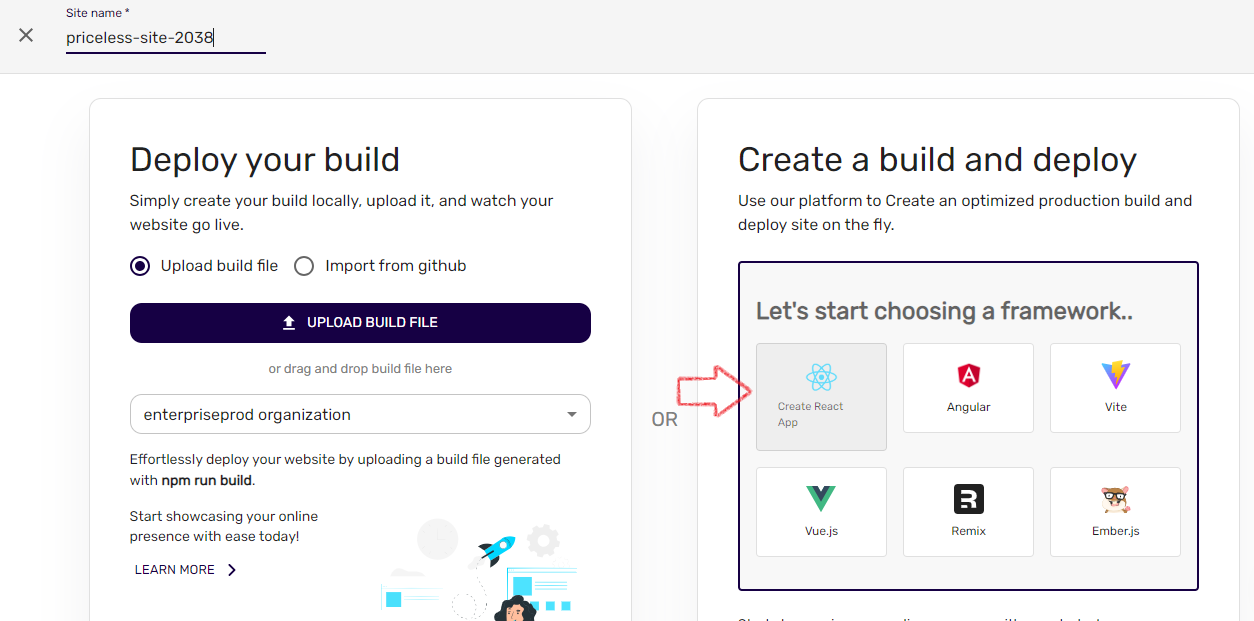
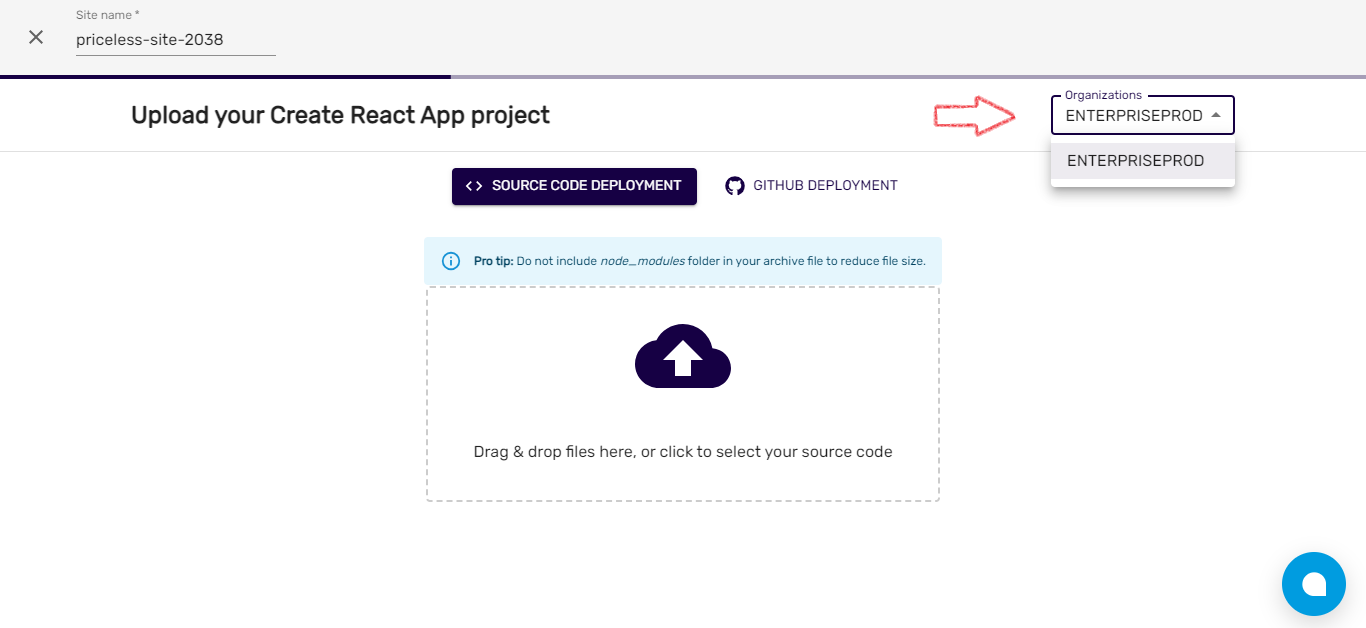
3. Choose Organization:#
- Select the organization where you want to deploy the website.
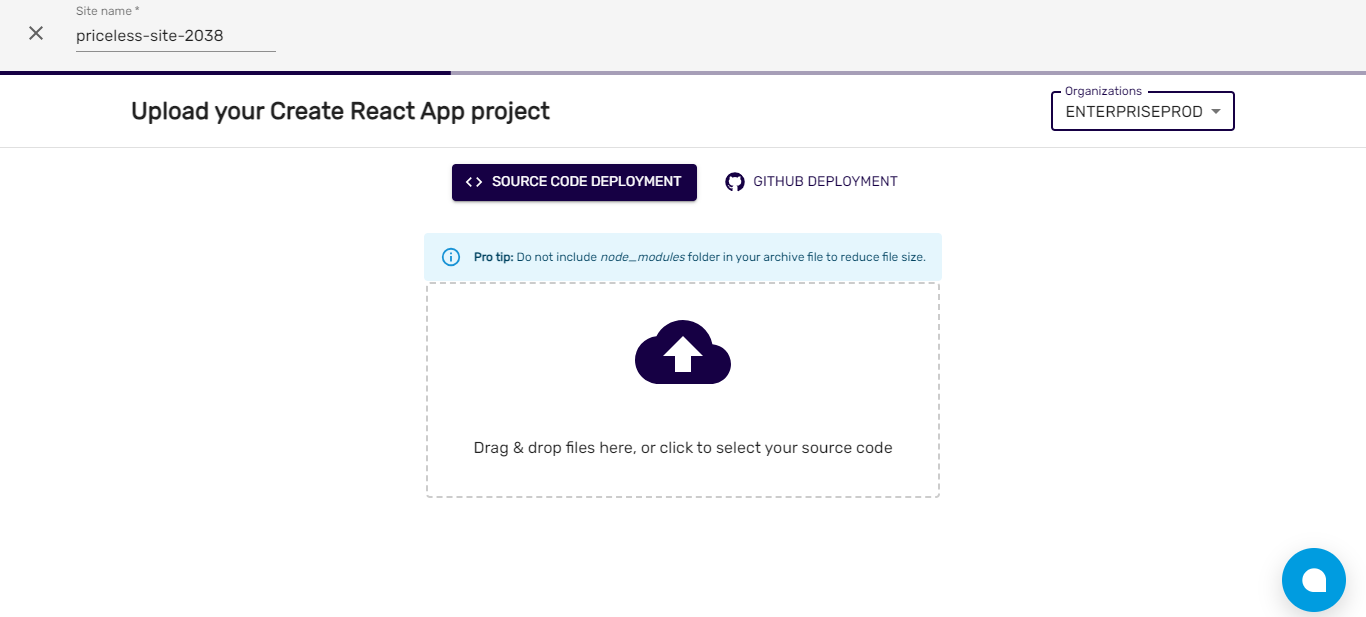
4. Deployment Options:#
- Choose between:
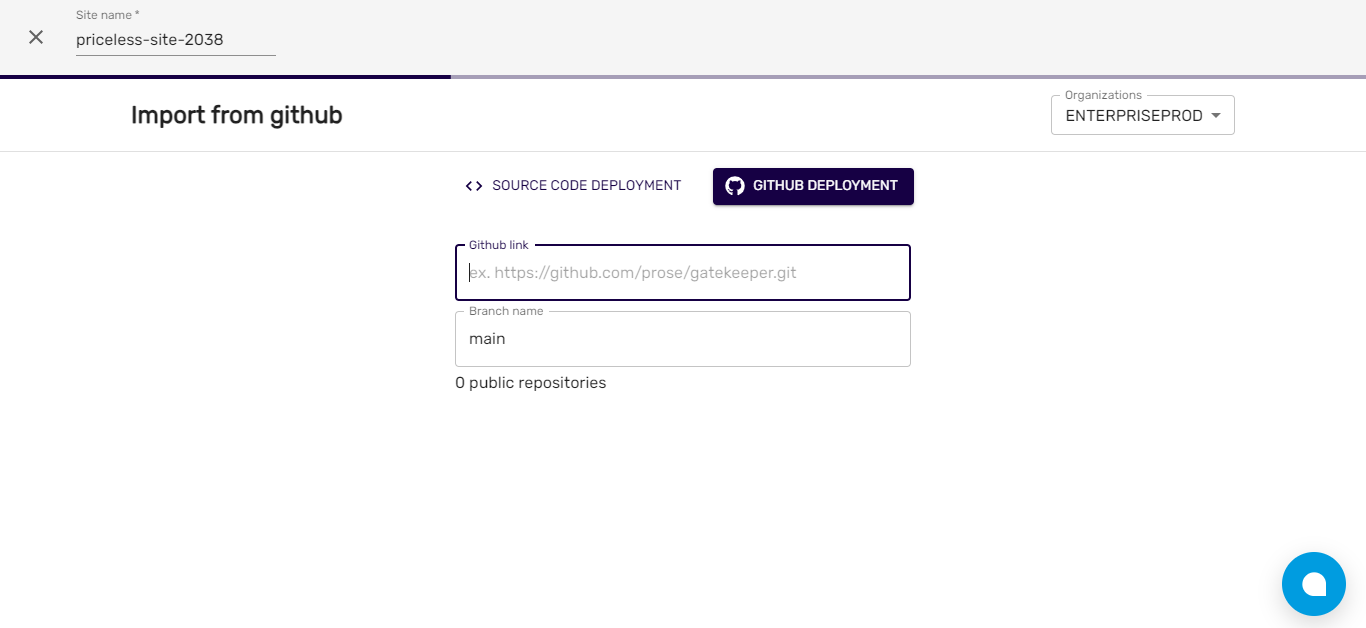
- Source Code Deployment: Upload your source code from your local device.
- GitHub Deployment: Provide the repository link and branch name. After entering the branch name and repo link, click on
Done
5. Configuration:#
- Environment Variables: If your project requires environment variables, add them here.
- Select Install Command: Enter the command used to install your project's software dependencies.
- Build Command: Enter the command provided by your frontend framework for compiling your code.
- Output Directory: Specify the directory where your compiled frontend will be located.
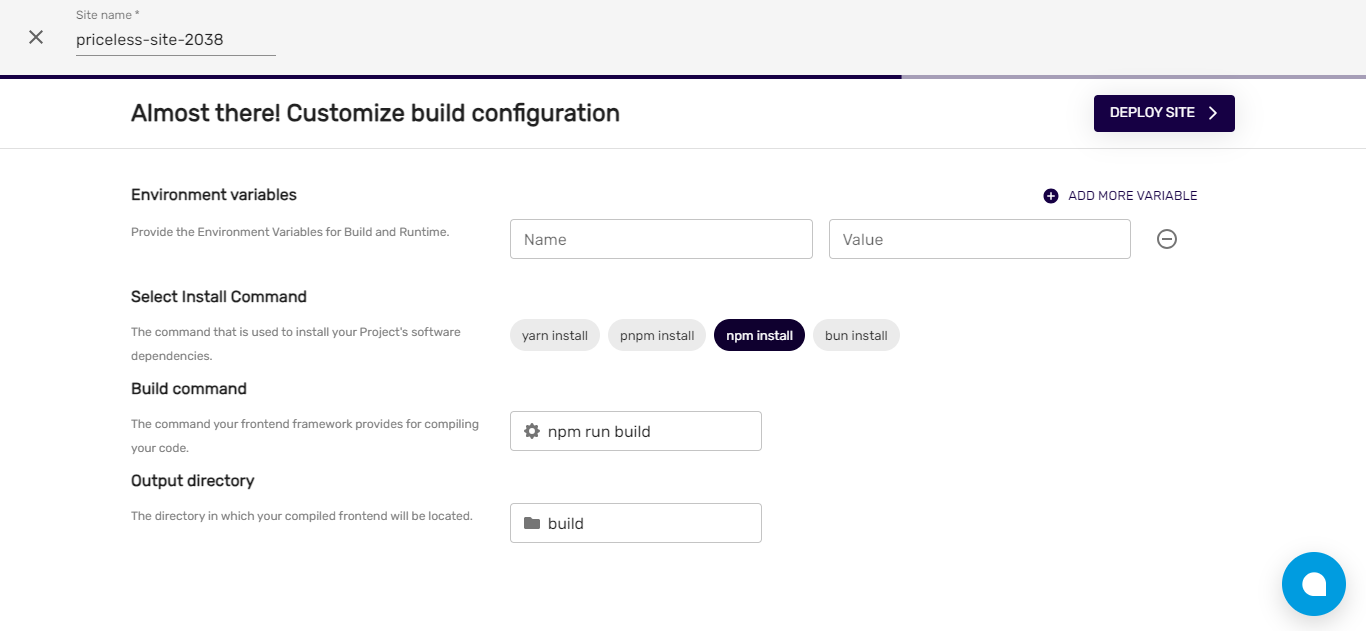
6. Deploy Site:#
- Click on the
Deploy sitebutton to initiate the deployment process.
7. After Deployment:#
- Once the deployment process is complete, click on the application to view its details.
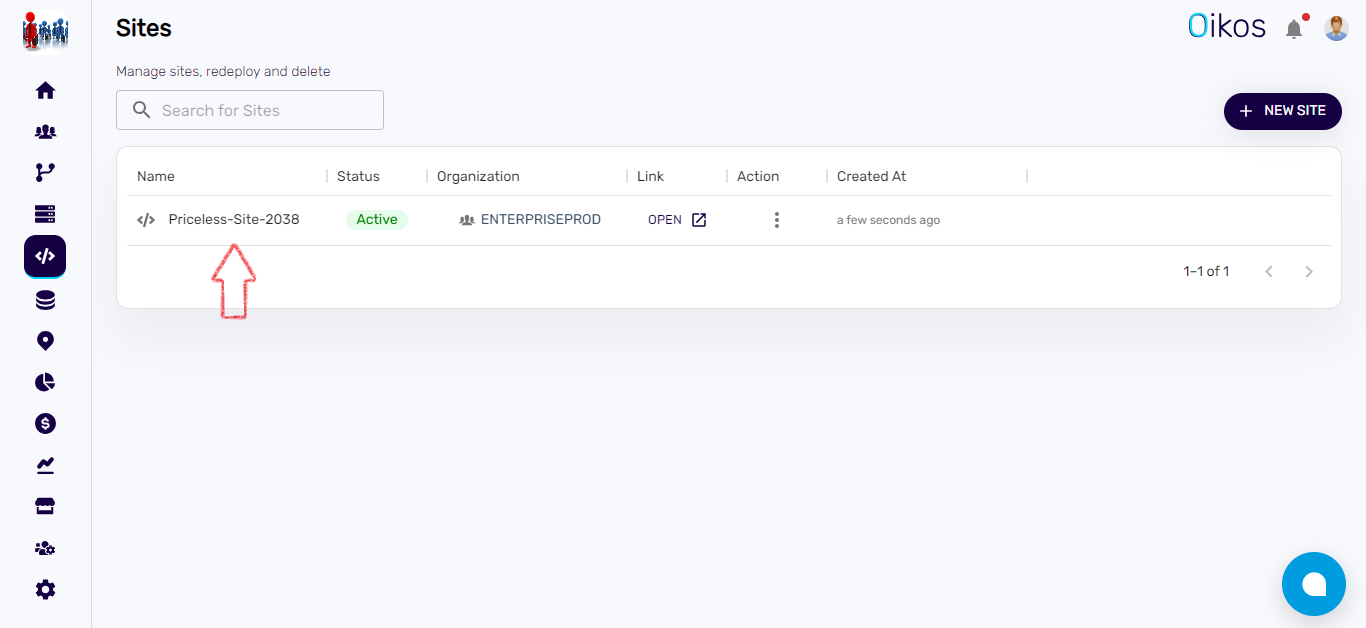
- Click on
Open Siteto visit your website and verify the deployment.
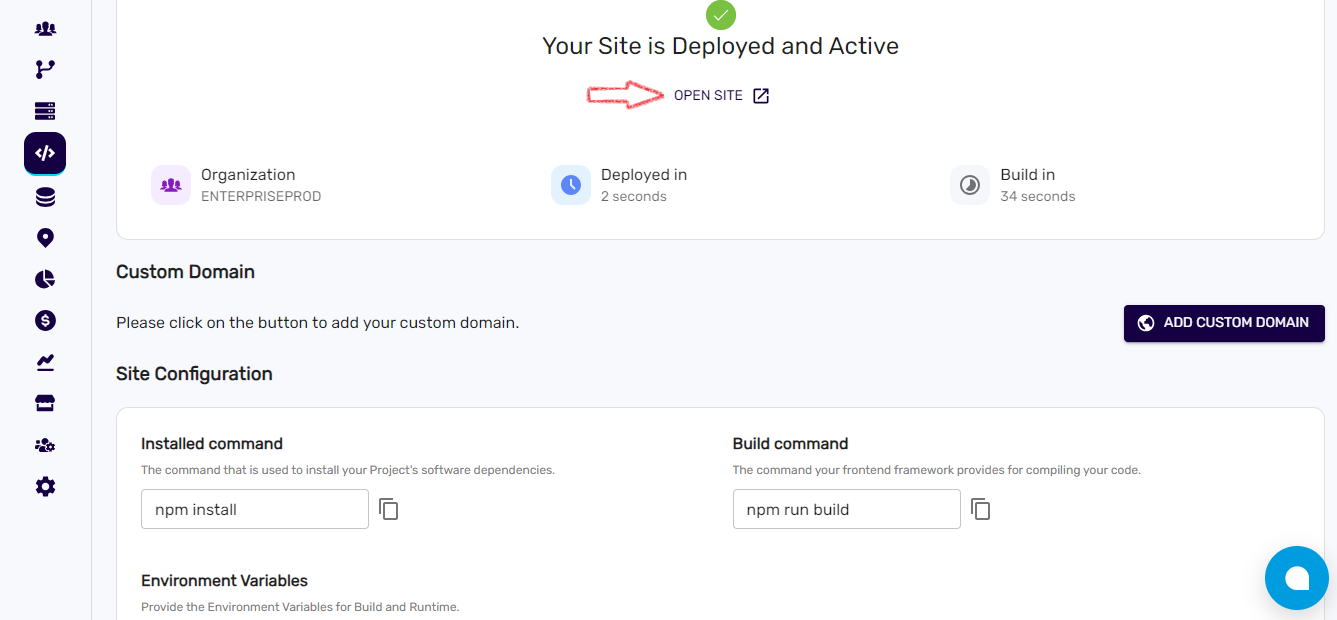
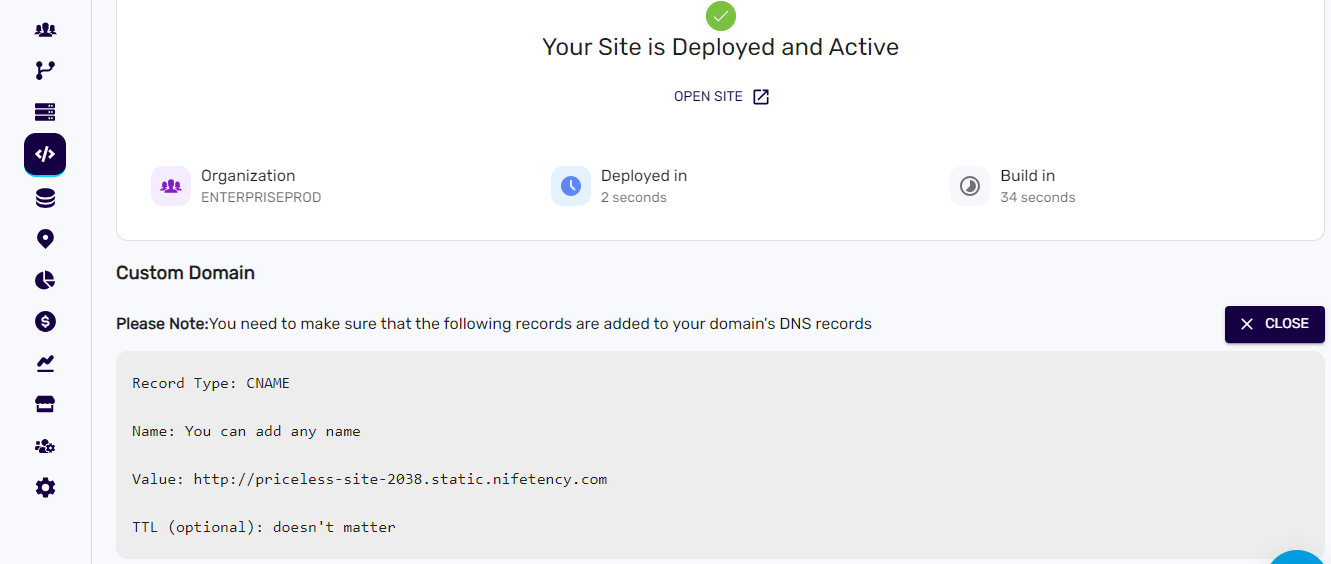
8. Custom-Domain Option:#
- Below the application details, you'll find the custom domain option.
- Click on that option to access the link where you can map your domain to the deployed website.