Nife GIT Actions Quickstart
Learn to deploy actions using Git Actions
Continuous Deployment using Nifectl (CLI) with GitHub#
- Ensure that your project code is available on GitHub..
- Get a Nife API token with nifectl auth token or login to the UI and fetch the Token
- Go to your newly created repository on GitHub and select Settings.
- Go to Secrets and create a secret called
NIFE_ACCESS_TOKENretrieved in Step Two - Clone the repository to your local machine to edit it
- Create .github/workflows/main.yml with these contents
- Commit your changes and push them up to GitHub.
The next changes and pushes will trigger based on the workflow. In this case, new images will be automatic deployed
- Monitor the Action Tabs in the project repository to view the logs.
Continuous Deployment using Nife-Deploy(UI) with GitHub#
- Add your Github PAT Here: https://launch.nife.io/settings/token . (If you need assistance obtaining Github PAT, refer to our step-by-step guide.)
- Deploy your application using code deployment. know more
Copy your Nife API token from https://launch.nife.io/settings/token, go to your repository on GitHub, select Settings, navigate to Secrets, and create a new secret called NIFE_ACCESS_TOKEN, then paste the copied access token.
Clone the repository to your local machine to edit it.
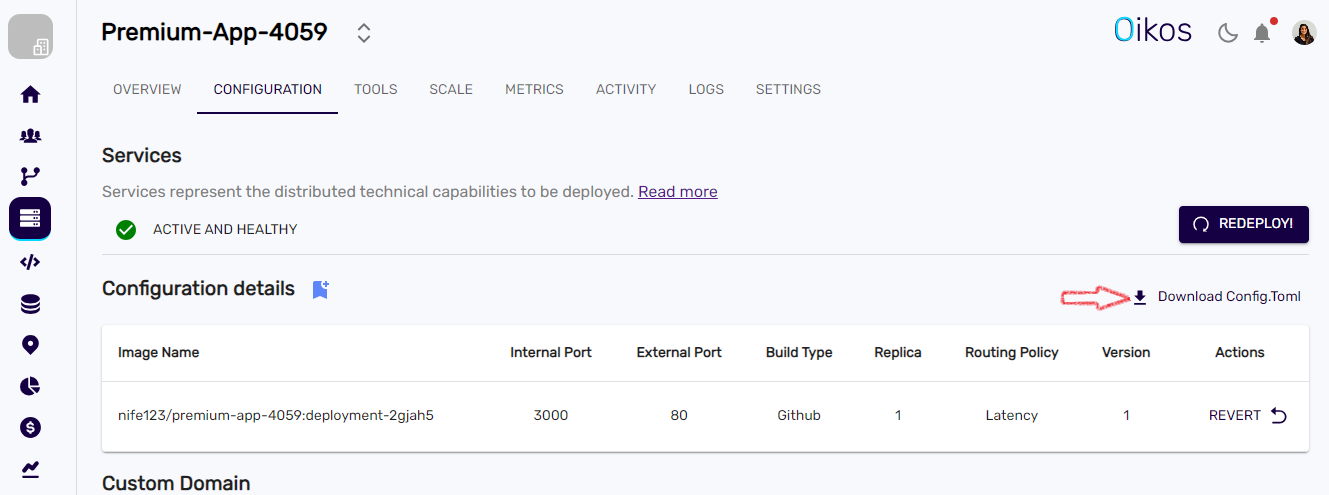
Download the
Config.tomlfile from your app configuration page and then rename it tonife.toml.
- Edit the your app toml file
Attach
/archive/refs/heads/main.zipto your GitHub link:Relpace build part
Move the
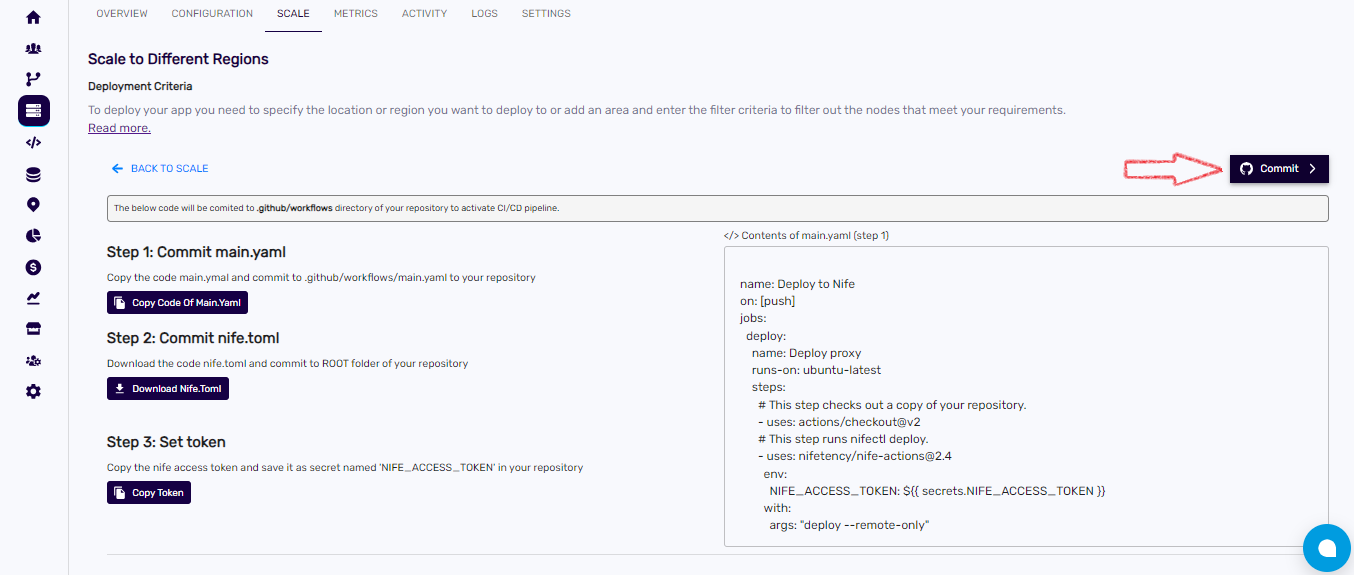
nife.tomlfile to the root folder of your project. Then push it to GitHub.Open Your App Scale Section. Know More. Click on Integrate CI/CD with GitHub and then click on
Commit.

This pushes the main.yaml file to GitHub, which will trigger the workflow. In this case, new images will be automatically deployed.
- Monitor the Action Tabs in the project repository to view the logs.
More#
Find GitHub Actions on MarketPlace
Learn More GitHub Actions Documentation