11 posts tagged with "aws"

View All Tags

How to Open Ports on Your EC2 Instance Using UFW (Uncomplicated Firewall)

If you've ever worked with AWS EC2 instances, you know that keeping your instance secure is crucial. One way to do this is by managing your firewall, and in this blog post, well go over how to configure UFW (Uncomplicated Firewall) on your EC2 instance to allow specific ports鈥攍ike SSH (port 22), MySQL (port 3306), and HTTP (port 80)鈥攕o you can connect to your instance and run services smoothly.

Why Use UFW?#

Illustration highlighting the importance of using UFW

On Ubuntu and other Debian-based systems, UFW is a straightforward command-line interface for controlling firewall rules. Because it is easy to set up and still provides a high degree of security, it is ideal for EC2 instances. Allowing the traffic you require while keeping unnecessary ports open to the internet is the aim here.

Prerequisites#

Before diving in, make sure:

  • Your EC2 instance is running Ubuntu or another Debian-based Linux distribution.
  • You have SSH access to the instance.
  • UFW is installed (well check and install it if necessary).

Step-by-Step Guide to Open Ports#

Step-by-step guide on how to open ports

1. Check if UFW is Installed#

First, let's check if UFW is installed on your EC2 instance. Connect to your EC2 instance and run:

sudo ufw status

If UFW is not installed, the command will return:

ufw: command not found

In that case, install it with:

sudo apt update
sudo apt install ufw

2. Allow Specific Ports#

Now, let's open the ports you need:

# Allow SSH (port 22)
sudo ufw allow 22
# Allow MySQL (port 3306)
sudo ufw allow 3306
# Allow HTTP (port 80)
sudo ufw allow 80

These commands let traffic through on the specified ports, ensuring smooth access to your instance.

3. Enable UFW#

If UFW is not already enabled, activate it by running:

sudo ufw enable

To verify, check the status:

sudo ufw status

You should see:

To Action From
-- ------ ----
22 ALLOW Anywhere
3306 ALLOW Anywhere
80 ALLOW Anywhere

4. Optional: Restrict Access to Specific IPs#

You may want to restrict access to particular IPs for extra security. For instance, to only permit SSH from your IP:

sudo ufw allow from 203.0.113.0 to any port 22

You can do the same for MySQL and HTTP:

sudo ufw allow from 203.0.113.0 to any port 3306
sudo ufw allow from 203.0.113.0 to any port 80

This adds an extra layer of security by preventing unwanted access.

5. Verify Your Firewall Rules#

Run the following command to check active rules:

sudo ufw status

This confirms which ports are open and from which IPs they can be accessed.

Troubleshooting Common Issues#

Guide to troubleshooting common issues

Can't Connect via SSH?#

If you cant connect to your EC2 instance via SSH after enabling UFW, make sure port 22 is open:

sudo ufw allow 22

Also, check your AWS Security Group settings and ensure SSH is allowed. You can review AWS security group rules here.

Can't Connect to MySQL?#

Ensure port 3306 is open and verify that your database allows remote connections.

Web Traffic Not Reaching the Instance?#

Check if port 80 is open and confirm that your EC2 security group allows inbound HTTP traffic.

Conclusion#

You now know how to use UFW to open particular ports on your EC2 instance, enabling HTTP, MySQL, and SSH communication while restricting access to unwanted ports. This keeps your server safe while guaranteeing that critical services run correctly.

Related Reads#

Want to dive deeper into AWS and cloud automation? Check out these blogs:

Automating Deployment and Scaling in Cloud Environments like AWS and GCP
Learn how to streamline your deployment processes and scale efficiently across cloud platforms like AWS and GCP.

Unleash the Power of AWS DevOps Tools to Supercharge Software Delivery
Explore the tools AWS offers to enhance your software delivery pipeline, improving efficiency and reliability.

Step-by-Step Guide to Multi-Cloud Automation with SkyPilot on AWS Step-by-Step Guide to Multi-Cloud Automation with SkyPilot on AWs

The Simplest Method for Beginning Cloud Hosting with AWS Lightsail

Isometric illustration of cloud computing with servers, a laptop, and a cloud upload icon.

AWS Lightsail can be the ideal choice for you if you're new to the cloud or simply want a more straightforward solution to host your projects. It's a quick and easy method for setting up virtual private servers (VPS) for your apps and websites. Although it works well for a lot of use scenarios, it isn't always the answer. Let's examine Lightsail's definition, its benefits, and situations in which it might not be the best option.

AWS Lightsail: What is it?#

AWS Lightsail is a cloud hosting solution that makes it easier to set up servers and apps. It is perfect for small-scale projects because it offers pre-configured VPS settings with predictable cost.

It only takes a few clicks to spin up a server with popular configurations like WordPress, Drupal, or LAMP (Linux, Apache, MySQL, PHP) stacks using Lightsail.

Lightsail is intended for:

  • Small businesses
  • Hobbyists or developers
  • Beginners in the cloud

Learn More About Bring Your Own Cluster (BYOC)

What Makes AWS Lightsail So Well-liked?#

Here's why Lightsail is so popular:

Usability#

A server may be quickly and easily set up thanks to the user-friendly dashboard and pre-built blueprints.

Costs That Are Predictable#

Lightsail eliminates unexpected bills by offering fixed monthly pricing. Plans that cover your computing, storage, and bandwidth requirements start at just $5 per month.

Apps that are Already Configured#

With Lightsail, you can start using ready-to-use configurations for custom web stacks or well-known apps like WordPress and Magento.

Controlled Services#

It takes care of load balancing, DNS administration, and automatic snapshots so you don't have to.

Integration of the AWS Ecosystem#

You can link your Lightsail instance to more sophisticated AWS services like S3, RDS, or CloudFront if your project expands.

AWS Lightsail: What Can You Do With It?#

Lightsail is quite adaptable. With it, you can accomplish the following:

  • Websites that host: Launch an online store, portfolio website, or WordPress blog.

  • Run Web Apps: Web apps can be hosted using the LAMP, Node.js, or MEAN stacks.

  • Try New Things and Learn: Establish a sandbox environment to test new software or gain knowledge about cloud computing.

  • Private Game Servers: Run your own server for Minecraft or another game.

  • E-commerce Stores: For your online store, use systems such as Magento or PrestaShop.

    Integrate Your AWS EKS Cluster - User Guide

When AWS Lightsail Should Not Be Used#

Minimalist illustration of a woman enabling a toggle switch with a checkmark.
Despite being ideal for small to medium-sized projects, Lightsail isn't always the best option in certain situations:

Intricate Structures#

EC2, ECS, or Kubernetes are preferable options if your application needs microservices architecture, high availability, or sophisticated networking.

High Requirements for Scalability#

Lightsail is intended for low-to-medium workloads that are predictable. EC2 or Auto Scaling Groups are better options if you anticipate substantial scaling or can manage high traffic volumes.

Personalized Networking Requirements#

Compared to AWS VPC, where you can set up custom subnets, NAT gateways, and security groups, Lightsail's networking features are more constrained.

Workloads involving Big Data or Machine Learning#

EC2 with GPU instances, AWS EMR, and SageMaker are superior options for resource-intensive workloads like machine learning or big data analysis.

More Complex AWS Integrations#

Lightsail is somewhat isolated from the rest of the AWS environment. Lightsail can be connected to some services, but it is not the best choice if your project requires a lot of connections with technologies like CloudFormation, Elastic Beanstalk, or IAM.

Enterprise-Level Applications#

For large-scale, mission-critical enterprise applications, Lightsail might not offer the flexibility and redundancy needed.

The Right Time to Select Lightsail#

Illustration of cloud synchronization with a clock and a woman working on a laptop.

Lightsail is ideal if:

  • You need to quickly launch a basic website or application.
  • You like your prices to be consistent and affordable.
  • You're testing small applications or learning about cloud hosting.

AWS Lightsail Documentation

Conclusion#

AWS Lightsail is an excellent resource for beginning cloud hosting. It saves you time, streamlines the procedure, and is reasonably priced. It's crucial to understand its limitations, though. Lightsail is an obvious choice for modest to medium-sized applications. However, if your requirements exceed its capacity, there are several options in the larger AWS ecosystem to grow with you. visit Nife.io - Cloud Deployment

Resolving Permissions Issues with IAM: Knowledge of the iam:CreateRole Error

Illustration of cloud security featuring a cloud icon with a padlock and chain, a shield, and network connections, representing secure cloud computing.

Have you ever been trying to do anything on AWS and been baffled by an error message that leaves you baffled? Often, the dreaded "not authorised to perform" error is the culprit. Usually, this occurs when a position or user lacks the authorisation needed to carry out a certain task. Have you ever witnessed anything similar to:

It is not permitted for user: arn:aws:sts::123456789012:assumed-role/role-name/username to perform: as no identity-based policy permits the iam:CreateRole action on resource: arn:aws:iam::123456789012:role/service-role/some-role.

You're not alone, so don't worry! We'll explore the meaning of this error, its causes, and鈥攁bove all鈥攈ow to resolve it in this piece.

What's Happening Here?#

The problem message is rather simple: The role or user you are working with does not possess the necessary authorisation to establish a new IAM role. The issue indicates that there is no policy associated with the user or role that permits the action iam:CreateRole, which is strictly restricted.

One of AWS's most effective tools for managing access to AWS resources is Identity and Access Management (IAM). However, great power also comes with great responsibility, and if you're not cautious, controlling permissions can get a little complicated. There is obviously a missing component in your AWS setup, as shown by the error message you are viewing.

When Do You Run Into This Issue?#

You'll typically run into the "not authorized to perform iam:CreateRole" issue in the following scenarios:

Creating a New IAM Role for a Service or User#

Creating a new role could be necessary when configuring an AWS service (such as AWS CodeBuild, AWS Lambda, or Amazon EC2) that needs a particular IAM role for rights. This error occurs when a person or service tries to create that role without having the iam:CreateRole permissions.

Example: Trying to set up a CodeBuild project that requires a service role, but the user doesn't have permission to create that role.

Setting Up Automation or CI/CD Pipelines#

DevOps engineer working on CI/CD automation with an infinity loop symbol.

IAM roles may need to be created dynamically if you're automating infrastructure provisioning with a CI/CD pipeline (like Terraform or AWS CodePipeline). This error may occur if the pipeline's IAM role lacks the iam:CreateRole authorisation.

Example: Using a script that triggers AWS CloudFormation to create new resources but fails to create a role because the IAM role executing the script doesn't have iam:CreateRole.

Assigning or Modifying Service Roles#

If the user is unable to establish roles in IAM, a permission error may occur when you attempt to assign an existing role to the service or create a new role while working with services that must assume certain IAM roles, like AWS Lambda or Amazon ECS.

Example: Assigning a service role to a new EC2 instance but the user trying to do this doesn't have the iam:CreateRole permission.

Permissions Related to Infrastructure as Code (IaC) Tools#

Cybersecurity concept with businessmen, cloud storage, and a locked laptop

IAM role generation is managed by a number of infrastructure tools, such as Terraform, CloudFormation, or AWS CDK. This error will appear if you use any of these tools to generate resources that need new IAM roles and the user isn't authorised to create roles.

Example: Running a terraform apply command that tries to create new IAM roles as part of an infrastructure change, but the user running the command doesn't have permission to create roles.

Cross-Account Role Creation#

You may attempt to create roles in one AWS account from another if you're dealing with multiple accounts (for instance, creating a cross-account role). The iam:CreateRole operation will be rejected if the second account's IAM user lacks the authority to create roles in the first account.

Example: Trying to create a role in Account A using a user from Account B, but the user doesn't have cross-account permissions to create roles in Account A.

The Fix: Adding the Right Permission#

To solve this, you'll need to make sure the user or role has the correct permissions attached to it. Here's how:

Locate the Role or User#

First, figure out which role or user is running into the issue. In this case, it's arn:aws:sts::123456789012:assumed-role/role-name/username. You can find this in your IAM dashboard on the AWS console.

Check the Policies#

Next, take a look at the IAM policies attached to that role or user. Policies define what actions are allowed or denied. In this case, you need to ensure that the policy allows the iam:CreateRole action.

Update the Policy#

If the permission is missing, you'll need to add a new policy or update an existing one. Here's an example of what the policy might look like to allow creating roles:

{
"Version": "2012-10-17",
"Statement": [
{
"Effect": "Allow",
"Action": "iam:CreateRole",
"Resource": "arn:aws:iam::123456789012:role/service-role/some-role"
}
]
}

This policy gives permission to create roles for the specified resource (in this case, some-role). You can apply this to the user or role in question.

Things to Keep in Mind#

If you're still having trouble after adding the right policy, there are a few other things to check:

Conclusion#

Managing IAM permissions in AWS can be tricky, but by following best practices, troubleshooting errors like iam:CreateRole becomes easier. Grant the least privilege necessary, use roles over users, and keep policies up to date.

Integrate Your Cluster & Deploy Applications Easily. Learn how to connect your cluster with Nife and deploy applications effortlessly.

Explore Nife.io. Discover how Nife simplifies cloud deployments.

Related Reads#

Want to dive deeper into AWS and cloud automation? Check out these blogs:

Automating Deployment and Scaling in Cloud Environments like AWS and GCP
Learn how to streamline your deployment processes and scale efficiently across cloud platforms like AWS and GCP.

Unleash the Power of AWS DevOps Tools to Supercharge Software Delivery
Explore the tools AWS offers to enhance your software delivery pipeline, improving efficiency and reliability.

Step-by-Step Guide to Multi-Cloud Automation with SkyPilot on AWS Step-by-Step Guide to Multi-Cloud Automation with SkyPilot on AWs

My EC2 Instance Refuses SSH Connections - A Casual yet Technical Guide

When it comes to administering cloud servers, there's nothing quite like trying to SSH into your EC2 instance and receiving the dreaded Connection rejected message. Prepare to panic! But take a deep breath鈥攚e've all been there, and the solution is frequently simpler than it appears. Let's troubleshoot this problem together, keeping it light but technical.

ec2

Why is My EC2 Ignoring Me?#

Before we get into the answer, let's quickly explore why your instance may be giving you the silent treatment:

  • It's Alive... Right?
    • Perhaps the instance is turned off or failing its status checks. There is no machine and therefore no connection.
  • Locked Door: Security Group Issues
    • Your security group ((EC2's way of saying firewall rules))[https://docs.aws.amazon.com/AWSEC2/latest/UserGuide/ec2-security-groups.html] might not be letting you in.
  • The Wrong Address
    • If you do not have an Elastic IP attached, your public IP address may vary. Are you knocking on the wrong door?
  • Software Drama
    • SSH service might not be running, or the instance's firewall (hello, iptables) could be blocking port 22.
  • Hardware Drama
    • Rare, but hardware issues or improper disk configurations can lead to this. Did you edit /etc/fstab recently?

Let's Fix It! (Step-by-Step)#

Step 1: Breathe.#

You're not locked out indefinitely. AWS gives us plenty of tools to recover access.

Step 2: Check if the Instance is Running#

Log into the AWS Management Console and head to the EC2 Dashboard:

  • Is your instance in the Running state?
  • Are the status checks green? If they're red, AWS may already be indicating a hardware or configuration issue.

Step 3: Review Security Group Rules#

Imagine going up to a party with the wrong invitation. Security groups are your EC2's bouncers, deciding who gets in.

  • Go to Security Groups in the AWS Console.

Make sure there's an inbound rule allowing SSH (port 22) from your IP:

Type: SSH
Protocol: TCP
Port Range: 22
Source: Your IP (or 0.0.0.0/0 for testing鈥攋ust don't leave it open forever!)

Step 4: Confirm the Public IP or DNS#

Every instance has an address, but it may vary unless you've configured an Elastic IP. Make sure you're using the right public IP/DNS name.

Run the SSH command:

ssh -i "your-key.pem" ubuntu@<PUBLIC_IP>

Step 5: Test Your Key and Permissions#

Your private key file (.pem) is like a VIP pass. Without proper permissions, it won't work. Ensure it's secure:

chmod 400 your-key.pem

Retry SSH.

Step 6: The Firewall's Watching Too#

Once inside the instance, check if the OS's internal firewall is behaving:

sudo iptables -L -n

If you see rules blocking port 22, adjust them:

sudo iptables -I INPUT -p tcp --dport 22 -j ACCEPT

Step 7: Is SSH Even Running?#

If your EC2 is a house, the SSH daemon (sshd) is the butler answering the door. Make sure it's awake:

sudo systemctl status sshd

If it's not running:

sudo systemctl start sshd

But What if It's REALLY Bad?#

Sometimes the problem is deeper. Maybe you misconfigured /etc/fstab or the instance itself is inaccessible. Don't sweat it鈥擜WS has your back: Use EC2 Instance Connect: A browser-based SSH client for emergencies. Attach the Volume to Another Instance: Detach the root volume, fix the configuration, and reattach it.

The Takeaway#

AWS EC2 instances are powerful, but they are not immune to minor issues. Whether it's a misconfigured firewall or a stopped SSH service, remedies are always available. And, hey, the next time Connection rejected appears, you'll know just how to convince your instance to open the door again. Enjoy cloud computing!

Related Reads#

Want to dive deeper into AWS and cloud automation? Check out these blogs:

Automating Deployment and Scaling in Cloud Environments like AWS and GCP
Learn how to streamline your deployment processes and scale efficiently across cloud platforms like AWS and GCP.

Unleash the Power of AWS DevOps Tools to Supercharge Software Delivery
Explore the tools AWS offers to enhance your software delivery pipeline, improving efficiency and reliability.

Step-by-Step Guide to Multi-Cloud Automation with SkyPilot on AWS Step-by-Step Guide to Multi-Cloud Automation with SkyPilot on AWs

Step-by-Step Guide to Multi-Cloud Automation with SkyPilot on AWS

SkyPilot is a platform that allows users to execute operations such as machine learning or data processing across many cloud services (such as Amazon Web Services, Google Cloud, or Microsoft Azure) without having to understand how each cloud works separately.

Skypilot logo

In simple terms, it does the following:

Cost Savings: It finds the cheapest cloud service and automatically runs your tasks there, saving you money.

Multi-Cloud Support>: You can execute your jobs across several clouds without having to change your code for each one.

Automation: SkyPilot handles technical setup for you, such as establishing and stopping cloud servers, so you don't have to do it yourself.

Spot Instances:It employs a unique form of cloud server that is less expensive (but may be interrupted), and if it is interrupted, SkyPilot instantly transfers your task to another server.

Getting Started with SkyPilot on AWS#

Prerequisites#

Before you start using SkyPilot, ensure you have the following:

1. AWS Account#

To create and manage resources, you need an active AWS account with the relevant permissions.

  • EC2 Instances: Creating, modifying, and terminating EC2 instances.

  • IAM Roles: Creating and managing IAM roles that SkyPilot will use to interact with AWS services.

  • Security Groups: Setting up and modifying security groups to allow necessary network access.

You can attach policies to your IAM user or role using the AWS IAM console to view or change permissions.

2. Create IAM Policy for SkyPilot#

You should develop a custom IAM policy with the necessary rights so that your IAM user may utilize SkyPilot efficiently. Proceed as follows:

Create a Custom IAM Policy:

  • Go to the AWS Management Console.
  • Navigate to IAM (Identity and Access Management).
  • Click on Policies in the left sidebar and then Create policy.
  • Select the JSON tab and paste the following policy:
json
{
"Version": "2012-10-17",
"Statement": [
{
"Effect": "Allow",
"Action": [
"ec2:Describe*",
"ec2:RunInstances",
"ec2:TerminateInstances",
"ec2:CreateSecurityGroup",
"ec2:DeleteSecurityGroup",
"ec2:AuthorizeSecurityGroupIngress",
"ec2:RevokeSecurityGroupIngress",
"ec2:CreateTags",
"iam:CreateInstanceProfile",
"iam:AddRoleToInstanceProfile",
"iam:PassRole",
"iam:CreateRole",
"iam:PutRolePolicy",
"iam:DeleteRole",
"iam:DeleteInstanceProfile",
"iam:RemoveRoleFromInstanceProfile"
],
"Resource": "*"
}
]
}
  • Click Next: Tags and then Next: Review.
  • Provide a name for the policy (e.g., SkyPilotPolicy) and a description.
  • Click Create policy to save it.

Attach the Policy to Your IAM User:

  • Navigate back to Users and select the IAM user you created earlier.
  • Click on the Permissions tab.
  • Click Add permissions, then Attach existing policies directly.
  • Search for the policy you just created (e.g., SkyPilotPolicy) and select it.
  • Click Next: Review and then Add permissions.
3. Python#

Make sure your local computer is running Python 3.7 or later. The official Python website. offers the most recent version for download.

Use the following command in your terminal or command prompt to confirm that Python is installed:

python --version

If Python is not installed, follow the instructions on the Python website to install it.

4. SkyPilot Installed#

You need to have SkyPilot installed on your local machine. SkyPilot supports the following operating systems:

  • Linux
  • macOS
  • Windows (via Windows Subsystem for Linux (WSL))

To install SkyPilot, run the following command in your terminal:

pip install skypilot[aws]

After installation, you can verify if SkyPilot is correctly installed by running:

sky --version

The installation of SkyPilot is successful if the command yields a version number.

5. AWS CLI Installed#

To control AWS services via the terminal, you must have the AWS Command Line Interface (CLI) installed on your computer.

To install the AWS CLI, run the following command:

pip install awscli

After installation, verify the installation by running:

aws --version

If the command returns a version number, the AWS CLI is installed correctly.

6. Setting Up AWS Access Keys#

To interact with your AWS account via the CLI, you'll need to configure your access keys. Here's how to set them up:

Create IAM User and Access Keys:

  • Go to the AWS Management Console.
  • Navigate to IAM (Identity and Access Management).
  • Click on Users and then select user which you created before.
  • Click on Security Credentials.
  • Click on Create Access Key.
  • In use case select Command Line Interface.
  • Give the confirmation and click on next.
  • Click on Create Access Key and download the Access key.

Configure AWS CLI with Access Keys:

  • Run the following command in your terminal to configure the AWS CLI:
aws configure

When prompted, enter your AWS access key ID, secret access key, default region name (e.g., us-east-1), and the default output format (e.g., json).

Example:

AWS Access Key ID [None]: YOUR_ACCESS_KEY_ID
AWS Secret Access Key [None]: YOUR_SECRET_ACCESS_KEY
Default region name [None]: us-east-1
Default output format [None]: json

Once the AWS CLI is configured, you can verify the configuration by running:

aws sts get-caller-identity

This command will return details about your AWS account if everything is set up correctly.

Launching a Cluster with SkyPilot#

Once you have completed the prerequisites, you can launch a cluster with SkyPilot.

1. Create a Configuration File#

Create a file named sky-job.yaml with the following content:

Example:

resources:
cloud: AWS
instance_type: t2.medium
region: us-west-2
ports:
- 80
run: |
docker run -d -p 80:80 nginx:latest
2. Launch the Cluster#

In your terminal, navigate to the directory where your sky.yaml file is located and run the following command to launch the cluster:

sky launch sky-job.yaml

This command will provision the resources specified in your sky.yaml file.

3. Monitor the Cluster Status#

To check the status of your cluster, run:

sky status
4. Terminate the Cluster#

If you want to terminate the cluster, you can use the following command:

sky terminate sky-job.yaml

This command will clean up the resources associated with the cluster.

5. Re-launching the Cluster#

If you need to launch the cluster again, you can simply run:

sky launch sky-job.yaml

This command will recreate the cluster using the existing configuration.

Conclusion#

Now that you've completed the above steps, you should be able to install SkyPilot, launch an AWS cluster, and properly manage it. This guide will help you get started with SkyPilot by providing a complete introduction. Good luck with the clustering!

Useful Resources for SkyPilot on AWS#

Readers wishing to extend their expertise or explore other configuration possibilities, here are some valuable resources:

  • SkyPilot Official Documentation
    Visit the SkyPilot Documentation for comprehensive guidance on setup, configuration, and usage across cloud platforms.

  • AWS CLI Installation Guide
    Learn how to install the AWS CLI by visiting the official AWS CLI Documentation.

  • Python Installation
    Ensure Python is correctly installed on your system by following the Python Installation Guide.

  • Setting Up IAM Permissions for SkyPilot
    SkyPilot requires specific AWS IAM permissions. Learn how to configure these by checking out the IAM Policies Documentation.

  • Running SkyPilot on AWS
    Discover the process of launching and managing clusters on AWS with the SkyPilot Getting Started Guide.

  • Using Spot Instances with SkyPilot
    Learn more about cost-saving with Spot Instances in the SkyPilot Spot Instances Guide.

Troubleshooting: DynamoDB Stream Not Invoking Lambda

DynamoDB Streams and AWS Lambda can be integrated to create effective serverless apps that react to changes in your DynamoDB tables automatically. Developers frequently run into problems with this integration when the Lambda function is not called as intended. We'll go over how to troubleshoot and fix scenarios where your DynamoDB Stream isn't triggering your Lambda function in this blog article.

DynamoDB Streams and AWS Lambda

What Is DynamoDB Streams?#

Data changes in your DynamoDB table are captured by DynamoDB Streams, which enables you to react to them using a Lambda function. Every change (like INSERT, UPDATE, or REMOVE) starts the Lambda function, which can then analyze the stream records to carry out other functions like data indexing, alerts, or synchronization with other services. Nevertheless, DynamoDB streams occasionally neglect to call the Lambda function, which results in the modifications going unprocessed. Now let's explore the troubleshooting procedures for this problem.

1. Ensure DynamoDB Streams Are Enabled#

Making sure DynamoDB Streams are enabled for your table is the first step. The Lambda function won't get any events if streams aren't enabled. Open the Management Console for AWS. Go to Your Table > DynamoDB > Tables > Exports and Streams. Make sure DynamoDB Streams is enabled and configured to include NEW_IMAGE at the very least. Note: What data is recorded depends on the type of stream view. Make sure your view type is NEW_IMAGE or NEW_AND_OLD_IMAGES for a typical INSERT operation.

2. Check Lambda Trigger Configuration#

A common reason for Lambda functions not being invoked by DynamoDB is an improperly configured trigger. Open the AWS Lambda console. Select your Lambda function and navigate to Configuration > Triggers. Make sure your DynamoDB table's stream is listed as a trigger. If it's not listed, you'll need to add it manually: Click on Add Trigger, select DynamoDB, and then configure the stream from the dropdown. This associates your DynamoDB stream with your Lambda function, ensuring events are sent to the function when table items change.

3. Examine Lambda Function Permissions#

To read from the DynamoDB stream, your Lambda function needs certain permissions. It won't be able to use the records if it doesn't have the required IAM policies.

Ensure your Lambda function's IAM role includes these permissions:

json
{
"Version": "2012-10-17",
"Statement": [
{
"Effect": "Allow",
"Action": [
"dynamodb:GetRecords",
"dynamodb:GetShardIterator",
"dynamodb:DescribeStream",
"dynamodb:ListStreams"
],
"Resource": "arn:aws:dynamodb:region:account-id:table/your-table-name/stream/*"
}
]
}

Lambda can read and process records from the DynamoDB stream thanks to these actions.

4. Check for CloudWatch Logs#

Lambda logs detailed information about its invocations and errors in AWS CloudWatch. To check if the function is being invoked (even if it's failing):

  1. Navigate to the CloudWatch console.
  2. Go to Logs and search for your Lambda function's log group (usually named /aws/lambda/<function-name>).
  3. Look for any logs related to your Lambda function to identify issues or verify that it's not being invoked at all.

Note: If the function is not being invoked, there might be an issue with the trigger or stream configuration.

5. Test with Manual Insertions#

Use the AWS console to manually add an item to your DynamoDB table to see if your setup is functioning: Click Explore table items under DynamoDB > Tables > Your Table. After filling out the required data, click Create item and then Save. Your Lambda function should be triggered by this. After that, verify that the function received the event by looking at your Lambda logs in CloudWatch.

6. Verify Event Structure#

Your Lambda function's handling of the incoming event data may be the problem if it is being called but failing. Make that the code in your Lambda function is handling the event appropriately. An example event payload that Lambda gets from a DynamoDB stream is as follows:

json
{
"Records": [
{
"eventID": "1",
"eventName": "INSERT",
"eventSource": "aws:dynamodb",
"dynamodb": {
"Keys": {
"Id": {
"S": "123"
}
},
"NewImage": {
"Id": {
"S": "123"
},
"Name": {
"S": "Test Name"
}
}
}
}
]
}

Make sure this structure is handled correctly by your Lambda function. Your function won't process the event as intended if the NewImage or Keys section is absent from your code or if the data format is off. Lambda code example Here is a basic illustration of how to use your Lambda function to handle a DynamoDB stream event:

python
import json
def lambda_handler(event, context):
# Log the received event for debugging
print("Received event: ", json.dumps(event, indent=4))
# Process each record in the event
for record in event['Records']:
if record['eventName'] == 'INSERT':
new_image = record['dynamodb'].get('NewImage', {})
document_id = new_image.get('Id', {}).get('S')
if document_id:
print(f"Processing document with ID: {document_id}")
else:
print("No document ID found.")
return {
'statusCode': 200,
'body': 'Function executed successfully.'
}

7. Check AWS Region and Limits#

Make sure the Lambda function and your DynamoDB table are located in the same AWS region. The stream won't activate the Lambda function if they are in different geographical locations. Check the AWS service restrictions as well: Lambda concurrency: Make that the concurrency limit isn't being reached by your function. Throughput supplied by DynamoDB: Your Lambda triggers may be missed or delayed if your DynamoDB table has more read/write capacity than is allocated.

8. Retry Behavior#

There is an inherent retry mechanism in lambda functions that are triggered by DynamoDB Streams. AWS may eventually stop retrying if your Lambda function fails several times, depending on your configuration. To guarantee that no data is lost during processing, make sure your Lambda function retries correctly and handles mistakes graciously.

Conclusion#

A misconfiguration in the stream settings, IAM permissions, or event processing in the Lambda code may be the cause if DynamoDB streams are not triggering your Lambda function. You should be able to identify and resolve the issue by following these procedures and debugging the problem with CloudWatch Logs. The most important thing is to make sure your Lambda function has the required rights to read from the DynamoDB stream and handle the event data appropriately, as well as that the stream is enabled and connected to your Lambda function. Enjoy your troubleshooting!

How to Decommission an Old Domain Controller and Set Up a New One on AWS EC2

You might eventually need to swap out an old Domain Controller (DC) for a new one when maintaining a network architecture. Decommissioning an outdated DC and installing a new one with DNS capability may be part of this procedure. The procedure is simple for those using AWS EC2 instances for this purpose, but it needs to be carefully planned and carried out. A high-level method to successfully managing this shift can be found below.

Domain cartoon image

1. Install the New Domain Controller (DC) on a New EC2 Instance#

In order to host your new Domain Controller, you must first establish a new EC2 instance.

  • EC2 Instance Setup: Begin by starting a fresh Windows Server-based EC2 instance. For ease of communication, make sure this instance is within the same VPC or subnet as your present DC and is the right size for your organization's needs.
  • Install Active Directory Domain Services (AD DS): Use the Server Manager to install the AD DS role after starting the instance.

  • Promote to Domain Controller: After the server has been promoted to a Domain Controller, the AD DS role must be installed. You will have the opportunity to install the DNS server as part of this promotion procedure. In order to manage the resolution of your domain name, this is essential.

2. Replicate Data from the Old DC to the New DC#

Making ensuring all of the data from the old DC is copied onto the new server is the next step once the new DC is promoted.

  • Enable Replication: Active Directory will automatically replicate the directory objects, such as users, machines, and security policies, while the new Domain Controller is being set up. If DNS is set up on the old server, this will also include DNS records.

  • Verify Replication: Ascertain whether replication was successful. Repadmin and dcdiag, two built-in Windows utilities, can be used to monitor and confirm that the data has been fully synchronized between both controllers.

3. Verify the Health of the New DC#

Before decommissioning the old Domain Controller, it is imperative to make sure the new one is completely functional.

  • Use dcdiag: This utility examines the domain controller's condition. It will confirm that the DC is operating as it should.

  • To make sure no data or DNS entries are missing, use the repadmin utility to verify Active Directory replication between the new and old DCs.

4. Update DNS Settings#

You must update the DNS settings throughout your network after making sure the new DC is stable and replicating correctly.

  • Update VPC/DHCP DNS Settings: If you're using DHCP, make sure that the new DC's IP address is pointed to by updating the DNS settings in your AWS VPC or any other DHCP servers. This enables clients on your network to resolve domain names using the new DNS server.

  • Update Manually Assigned DNS: Make sure that any computers or programs that have manually set up DNS are updated to resolve DNS using the new Domain Controller's IP address.

5. Decommission the Old Domain Controller#

It is safe to start decommissioning the old DC when the new Domain Controller has been validated and DNS settings have been changed.

  • Demote the Old Domain Controller: To demote the old server, use the dcpromo command. With this command, the server no longer serves as a Domain Controller in the network and is removed from the domain.

  • Verify Decommissioning: After demotion, examine the AD structure and replication status to make sure the previous server is no longer operating as a DC.

6. Clean Up and DNS Updates#

With the old DC decommissioned, there are some final cleanup tasks to ensure smooth operation.

  • Tidy Up DNS and AD: Delete from both DNS and Active Directory any last traces of the previous Domain Controller. DNS entries and metadata are examples of this.

  • Verify Client DNS Settings: Verify that every client computer is correctly referring to the updated DNS server.

Assigning IP Addresses to the New EC2 Instance#

You must make sure that your new DC has a stable IP address because your previous DC was probably linked to a particular one.

  • Elastic IP Assignment: The new EC2 instance can be given an elastic IP address, which will guarantee that it stays the same IP throughout reboots and session restarts. By doing this, DNS resolution and domain service interruptions are prevented.

  • Update Routing if Needed: Verify that the new Elastic IP is accessible and correctly routed both inside your VPC and on any other networks that communicate with your domain.

    Additional Considerations#

  • Networking Configuration: Ascertain that your EC2 instances are correctly networked within the same VPC and that the security groups are set up to permit the traffic required for AD DS and DNS functions.

  • DNS Propagation: The time it takes for DNS to propagate may vary depending on the size of your network. Maintain network monitoring and confirm that all DNS modifications have been properly distributed to clients and external dependencies.

Conclusion#

You can completely decommission your old Domain Controller located on an EC2 instance and install a new one with a DNS server by following these instructions. This procedure permits the replacement or enhancement of your underlying hardware and software infrastructure while guaranteeing little downtime and preserving the integrity of your Active Directory system. Your new EC2 instance can be given a static Elastic IP address, which will guarantee DNS resolution stability even when the server restarts.

For further reading and detailed guidance, explore these resources:

Unleash the Power of AWS DevOps Tools: Supercharge Your Software Delivery

AWS DevOps Tools are essential for modern software delivery, enabling streamlined collaboration, automated workflows, and scalable infrastructure management, ensuring faster time-to-market and improved application reliability.

AWS DevOps Tools

The software development space is changing faster than ever. Traditional software development model is slow, inefficient, and incapable of dealing with changing customer needs. DevOps emerged as a game changer and revolutionized the software development lifecycle. DevOps is a set of practices that promotes automation, collaboration, and communication to achieve efficient and more reliable software delivery.

Release management is a critical aspect of DevOps. It ensures software releases are reliable, efficient, and flawless for the end user. Efficient software release management maintains the quality of code and increases customer satisfaction.

Businesses can streamline their software delivery and implement DevOps practices with Amazon Web Services (AWS). AWS is one of the most prominent and reputed cloud service providers. AWS provides robust DevOps tools that allow you to automate various stages of your software delivery process.

In this article, we'll cover AWS DevOps tools and how these tools empower organizations to streamline their software delivery process. From CodePipeline to CodeDeploy, we'll cover DevOps automation, collaboration, and continuous integration. Read the full article for complete insights.

Understanding DevOps and Software Release Management#

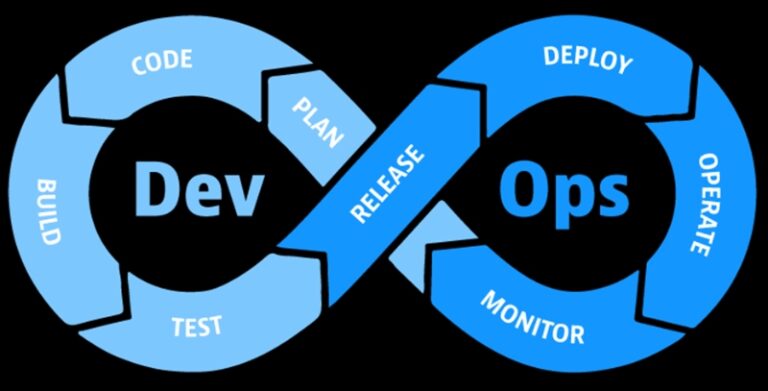
DevOps is a revolutionary approach to software development. DevOps embraces collaboration and communication between development and operation teams rather than traditional siloed communication. DevOps ensures efficient and reliable software delivery. Here are some core DevOps principles.

DevOps automation: DevOps embraces the use of automation tools. Automation tools allow you to reduce manual effort and automate repeated tasks. Automation makes the software development process predictable and streamlined.

Collaboration: At the heart of DevOps lies Collaboration. DevOps embraces collaboration and communication between different teams. DevOps promotes collaboration by creating cross-functional teams with diverse skill sets. The goal is to create a sense of shared responsibility and accountability.

Continuous Integration: CI is integrating code changes into a shared repository. In this shared repository the code is then tested automatically. This allows developers to catch any errors at the early development stage.

Continuous Delivery: Through CD, code changes are automatically deployed after proper testing and quality assurance.

The software release management process is crucial for deploying software efficiently and reliably into production. It consists of planning, coordinating, and overseeing. Release management in DevOps ensures smooth software delivery. Key responsibilities in the software release management process are as follows:

Planning: Planning is crucial for software release management. Every step in the release management is planned out with a proper timeline.

Version Control: Version control is another crucial aspect of release management in DevOps. The code version is managed to ensure the correct version is deployed. Version control also helps identify problems faster.

Automated Deployment: Another crucial aspect of the software release management process is automated deployment. It ensures code changes and updates are deployed automatically without any human effort. As a result, deployment becomes predictable and errors are reduced.

Monitoring and Rollback: Monitoring software after code changes is essential to ensure proper working. You should have a rollback plan in case of any problems.

The benefits of release management in DevOps are:

  • Faster time to market
  • Reduced Downtime
  • Improved Quality
  • Enhanced Collaboration

Leveraging AWS DevOps Tools#

Amazon Web Services (AWS) is one of the most prominent cloud-based service providers. AWS provides organizations with cloud-based services, including storage, databases, computing power, etc. AWS offers plenty of resources that can handle varying workloads with ease.

AWS also provides a collection of DevOps tools with unique capabilities for software release management. These tools work together to provide smooth software delivery. Here are some crucial AWS DevOps tools.

AWS CodePipeline: CodePipeline allows teams to create custom pipelines with multiple stages. automating the build, test, and deployment process.

AWS CodeCommit: CodeCommit provides a safe repository for developers. All the code changes merged by developers are stored in AWS CodeCommit. It can seamlessly integrate with other AWS services and third-party services.

AWS CodeBuild: Codebuild is a building service that runs automated tests on the source code to identify any bugs or problems. It ensures the source code is in deployable condition all the time.

AWS CodeDeploy: CodeDeploy automatically deploys the software in different environments to ensure functionality. It deploys applications on Amazon EC2 instances, Lambda functions, and even on-premises servers, ensuring consistent and reliable deployments at scale.

By integrating these tools, development teams can automatically trigger builds, run tests, and deploy code updates, reducing manual effort and accelerating software delivery.

Supercharging Software Delivery with AWS DevOps Tools#

Benefits of using AWS DevOps tools in the release management process#

Accelerated Delivery: With AWS DevOps automation, various aspects of the software delivery process can be automated. Automation reduces the chances of human error and makes the software more reliable and predictable. Automation also enables faster time to market for new features.

Continuous Integration and Continuous Delivery(CI/CD): AWS CodePipeline and CodeBuild enable CI/CD. Code changes from multiple developers are added to AWSCodeCommit, which then triggers an automated build, test, and deployment cycle.

Scalability and Flexibility: AWS provides a highly scalable and flexible infrastructure, allowing teams to adapt to changing project requirements and handle varying workloads efficiently. DevOps teams can utilize cloud resources on-demand, optimizing costs and resource utilization.

Real-life success stories of organizations leveraging AWS DevOps for accelerated delivery:#

Netflix: Netflix relies on AWS services like AWS CodePipeline and AWS CodeDeploy to manage its vast microservices architecture. Netflix is one of the first companies leveraging AWS DevOps for accelerated delivery.

Airbnb: Airbnb migrated its infrastructure to AWS and embraced DevOps practices, leading to shorter release cycles and faster time-to-market for product updates. They leveraged AWS DevOps tools to automate testing, deployment, and monitoring, improving application reliability and better user experience.

How AWS DevOps tools enable better collaboration and communication among teams:#

Centralized Code Repository: AWS CodeCommit provide a code repository for developers. Changes from all the developers are shown here using a version control system. This increases collaboration and ensures everyone has an updated copy.

Automated Testing and Feedback Loop: WS CodePipeline integrates with various testing tools, allowing automated testing of code changes. When a test fails, feedback is provided to the development team, prompting them to address issues promptly.

DevOps as a Service (DaaS) with AWS#

DevOps as a Service (DaaS) is a game-changing approach that leverages AWS's cloud capabilities to provide DevOps tools and services on a subscription basis. With DevOps as a Service, organizations can offload the operational burden of managing complex DevOps infrastructure, allowing them to focus on software development and innovation.

Among AWS's DaaS offerings are managed CI/CD pipelines, version control systems, and automated testing frameworks. Businesses can quickly increase agility, reduce time-to-market, and scale development processes with DaaS.

As technology evolves, organizations can stay ahead by embracing DevOps as a Service (DaaS) with AWS to optimize resource utilization, streamline software delivery, and stay ahead of the competition.

Introduction to Nife: A Cloud Computing Platform for Businesses#

Nife Labs is a revolutionary global edge application platform that empowers businesses and developers with a game-changing cloud computing solution. This cutting-edge platform allows rapid application deployment across any infrastructure, leading to faster scaling and simplified management.

Nife Labs allows businesses to focus on their core competencies, accelerating their software delivery processes, and eliminating manual and time-consuming tasks.

Nife Labs' unique features include the ability to deploy applications to any region or location without infrastructure concerns, real-time monitoring with customizable reports and alerts, and the flexibility to manage and extend applications based on specific criteria. These features streamline application management and enhance performance across various geographical locations.

Supercharge your software delivery with Nife!

Conclusion:#

In conclusion, release management in DevOps, amplified by the power of AWS DevOps tools, unlocks a realm of efficient software delivery. Embracing DevOps automation, collaboration, and continuous integration, teams can orchestrate a seamless CI/CD pipeline with AWS CodePipeline, CodeCommit, CodeBuild, CodeDeploy, and CodeStar. Leveraging DevOps as a Service (DaaS) on AWS brings scalability and productivity, enabling organizations to thrive in the dynamic digital landscape.

Automating Deployment And Scaling In Cloud Environments Like AWS and GCP

Introduction#

Automating the deployment of an application in cloud environments like AWS (Amazon Web Services) and GCP (Google Cloud Platform) can provide a streamlined workflow and reduce errors._

Cloud services have transformed the way businesses work. On the one hand, cloud computing provides benefits like reduced cost, flexibility, and scalability. On the other hand, it introduces new challenges that can be addressed through automation._

Automating Deployment in AWS and GCP#

Deployment and Scaling

Deployment of applications and services in a cloud-based system can be complex and time-consuming. Automating deployment in cloud systems like AWS and GCP streamlines the workflow. In this section, we will discuss the benefits of automation, tools available in GCP and AWS, and strategies for automation.

Benefits of Automation in Deployment#

Automating deployment provides many benefits, including:

  • Speed: Automation accelerates deployment processes, allowing timely incorporation of changes based on market requirements.
  • Consistency: Ensures uniformity across different environments.
  • Efficiency: Reduces manual effort, enabling organizations to scale deployment processes without additional labor.

Overview of GCP and AWS Deployment Services#

Google Cloud Platform (GCP) offers several services for automating deployment, including:

  • Jenkins and Spinnaker for CI/CD pipelines.
  • Google Kubernetes Engine (GKE), Google Cloud Build, Google Cloud Functions, and Google Cloud Deployment Manager for various deployment needs.

Amazon Web Services (AWS) provides several automation services, such as:

  • AWS Elastic Beanstalk, AWS CodeDeploy, AWS CodePipeline, AWS CloudFormation, and AWS SAM.
  • AWS SAM is used for serverless applications, while AWS CodePipeline facilitates continuous delivery.

Strategies for Automating Deployment#

Auto Deployment

Effective strategies for automating deployment in cloud infrastructure include:

  • Infrastructure as Code (IaC): Manage infrastructure through code, using tools like AWS CloudFormation and Terraform.
  • Continuous Integration and Continuous Deployment (CI/CD): Regularly incorporate changes using tools such as Jenkins, Travis CI, and CircleCI.

Best Practices for Automating Deployment#

To ensure effective automation:

  • Continuous Integration and Version Control: Build, test, and deploy code changes automatically.
  • IaC Tools: Use tools like Terraform for consistent deployments.
  • Automated Testing: Identify issues promptly to prevent critical failures.
  • Security: Ensure that only authorized personnel can make code changes.

Scaling in AWS and GCP#

Scaling is crucial for maintaining application responsiveness and reliability. Both AWS and GCP offer tools to manage scaling. This section covers the benefits of scaling in the cloud, an overview of scaling services, and strategies for automating scaling.

Benefits of Scaling in Cloud Environments#

Scaling in cloud environments provides:

  • Flexibility: Adjust resources according to traffic needs.
  • Cost Efficiency: Scale up or down based on demand, reducing costs.
  • Reliability: Ensure continuous application performance during varying loads.

Overview of AWS and GCP Scaling Services#

Both AWS and GCP offer tools for managing scaling:

  • Auto Scaling: Adjust resource levels based on traffic, optimizing cost and performance.
  • Load Balancing: Distribute traffic to prevent downtime and crashes.

Strategies for Automating Scaling#

Auto Scaling

Key strategies include:

  • Auto-Scaling Features: Utilize auto-scaling to respond to traffic changes.
  • Load Balancing: Evenly distribute traffic to prevent server overload.
  • Event-Based Scaling: Set auto-scaling rules for anticipated traffic spikes.

Best Practices for Automating Scaling#

Best practices for effective scaling automation:

  • Regular Testing: Ensure smooth operation of scaling processes.
  • IaC and CI/CD: Apply these practices for efficient and consistent scaling.
  • Resource Monitoring: Track resources to identify and address issues proactively.

Comparing AWS and GCP Automation#

AWS and GCP offer various automation tools and services. The choice between them depends on:

  • Implementation Approach: AWS tends to be more general, while GCP offers more customization.
  • Service Differences: For example, AWS Elastic Beanstalk provides a managed CI/CD experience, while GCP's Kubernetes offers container orchestration.

Choosing Between AWS and GCP for Automation#

Both platforms offer robust automation services. The decision to choose AWS or GCP should consider factors such as cost-effectiveness, reliability, scalability, and organizational needs.

Conclusion#

Automating deployment and scaling in cloud environments like AWS and GCP is crucial for efficiency and cost savings. This article explores the benefits, strategies, and tools for automating these processes and provides a comparison between AWS and GCP to help you choose the best solution for your needs.

Watch the video for an easy understanding of the blog!

What is the Principle of DevOps?

There are several definitions of DevOps, and many of them sufficiently explain one or more characteristics that are critical to finding flow in the delivery of IT services. Instead of attempting to provide a complete description, we want to emphasize DevOps principles that we believe are vital when adopting or shifting to a DevOps method of working.

devops as a service

What is DevOps?#

DevOps is a software development culture that integrates development, operations, and quality assurance into a continuous set of tasks (Leite et al., 2020). It is a logical extension of the Agile technique, facilitating cross-functional communication, end-to-end responsibility, and cooperation. Technical innovation is not required for the transition to DevOps as a service.

Principles of DevOps#

DevOps is a concept or mentality that includes teamwork, communication, sharing, transparency, and a holistic approach to software development. DevOps is based on a diverse range of methods and methodologies. They ensure that high-quality software is delivered on schedule. DevOps principles govern the service providers such as AWS Direct DevOps, Google Cloud DevOps, and Microsoft Azure DevOps ecosystems.

DevOps principles

Principle 1 - Customer-Centric Action#

Short feedback loops with real consumers and end users are essential nowadays, and all activity in developing IT goods and services revolves around these clients.

To fulfill these consumers' needs, DevOps as a service must have : - the courage to operate as lean startups that continuously innovate, - pivot when an individual strategy is not working - consistently invest in products and services that will provide the highest degree of customer happiness.

AWS Direct DevOps, Google Cloud DevOps, and Microsoft Azure DevOps are customer-oriented DevOps.

Principle 2 - Create with the End in Mind.#

Organizations must abandon waterfall and process-oriented models in which each unit or employee is responsible exclusively for a certain role/function and is not responsible for the overall picture. They must operate as product firms, with an explicit focus on developing functional goods that are sold to real consumers, and all workers must share the engineering mentality necessary to imagine and realise those things (Erich, Amrit and Daneva, 2017).

Principle 3 - End-to-end Responsibility#

Whereas conventional firms build IT solutions and then pass them on to Operations to install and maintain, teams in a DevOps as a service are vertically structured and entirely accountable from idea to the grave. These stable organizations retain accountability for the IT products or services generated and provided by these teams. These teams also give performance support until the items reach end-of-life, which increases the sense of responsibility and the quality of the products designed.

Principle 4 - Autonomous Cross-Functional Teams#

Vertical, fully accountable teams in product organizations must be completely autonomous throughout the whole lifecycle. This necessitates a diverse range of abilities and emphasizes the need for team members with T-shaped all-around profiles rather than old-school IT experts who are exclusively informed or proficient in, say, testing, requirements analysis, or coding. These teams become a breeding ground for personal development and progress (Jabbari et al., 2018).

Principle 5 - Continuous Improvement#

End-to-end accountability also implies that enterprises must constantly adapt to changing conditions. A major emphasis is placed on continuous improvement in DevOps as a service to eliminate waste, optimize for speed, affordability, and simplicity of delivery, and continually enhance the products/services delivered. Experimentation is thus a vital activity to incorporate and build a method of learning from failures. In this regard, a good motto to live by is "If it hurts, do it more often."

Principle 6 - Automate everything you can#

Many firms must minimize waste to implement a continuous improvement culture with high cycle rates and to develop an IT department that receives fast input from end users or consumers. Consider automating not only the process of software development, but also the entire infrastructure landscape by constructing next-generation container-based cloud platforms like AWS Direct DevOps, Google Cloud DevOps, and Microsoft Azure DevOps that enable infrastructure to be versioned and treated as code (Senapathi, Buchan and Osman, 2018). Automation is connected with the desire to reinvent how the team provides its services.

devops as a service

Remember that a DevOps Culture Change necessitates a Unified Team.#

DevOps is just another buzzword unless key concepts at the foundation of DevOps are properly implemented. DevOps concentrates on certain technologies that assist teams in completing tasks. DevOps, on the other hand, is first and foremost a culture. Building a DevOps culture necessitates collaboration throughout a company, from development and operations to stakeholders and management. That is what distinguishes DevOps from other development strategies.

Remember that these concepts are not fixed in stone while shifting to DevOps as a service. DevOps Principles should be used by AWS Direct DevOps, Google Cloud DevOps, and Microsoft Azure DevOps according to their goals, processes, resources, and team skill sets.