Cloud Provider Setup | AWS, GCP, Azure, OpenShift
This guide walks you through connecting your cloud provider accounts to Nife for VM provisioning and management. Start by gathering credentials from your cloud provider, then add them to Nife through the Cloud Accounts interface.
Prerequisites
Before adding a cloud account to Nife, gather credentials from your cloud provider:
- AWS: Access Key ID and Secret Access Key from an IAM user with EC2 permissions
- GCP: Service Account JSON key file with Compute Engine permissions
- Azure: Subscription ID, Tenant ID, Client ID, and Client Secret from a service principal
- OpenShift: API URL, Bearer Token, and Kubeconfig from your OpenShift cluster
See the detailed credential setup sections below for step-by-step instructions for each provider.
Adding Cloud Account in Nife
All cloud accounts are managed through the Cloud Accounts interface in Nife.
Accessing Cloud Accounts
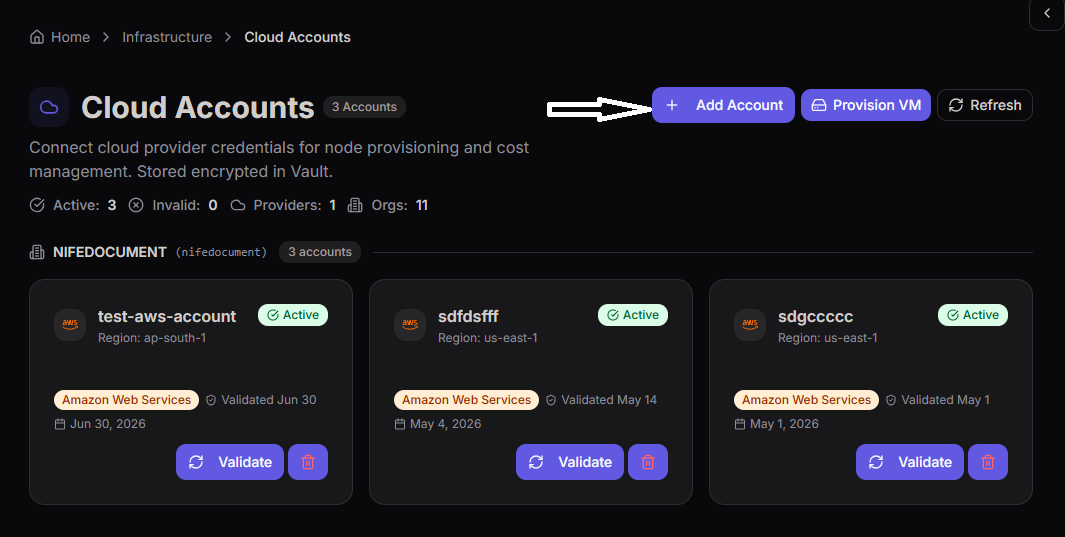
- Navigate to Home → Infrastructure → Cloud Accounts
- Click the Add Account button in the top-right corner
- The "Add Cloud Account" dialog opens
Common Steps for All Providers
Follow these steps regardless of which provider you're adding:
-
Select Organization: Choose the organization that will own this cloud account
- The account will be scoped to this organization
- Only users with access to this org can use the account
-
Select Provider: Choose your cloud provider (AWS, GCP, Azure, or OpenShift)
- Fields in the dialog update based on your selection
-
Enter Account Name: Give your account a descriptive name
- Examples:
production-aws,staging-gcp,dev-azure,cluster-ocp - Used to identify the account in the Cloud Accounts dashboard
- Examples:
-
Enter Provider-Specific Credentials: Fill in the required fields for your provider (see below)
- Field names and requirements vary by provider
-
Click Add Account: Credentials are validated and stored encrypted in Vault
- Secret keys and tokens are never returned via API
- Account immediately appears in the Cloud Accounts dashboard
AWS Account Setup
When Amazon Web Services is selected as the provider, fill in these fields:
Required Fields:
- Account Name: e.g.,
production-aws,staging-aws - Access Key ID: Starts with
AKIA, e.g.,AKIAIOSFODNN7EXAMPLE - Secret Access Key: Your IAM secret access key (stored securely, hidden after input)
- Default Region: e.g.,
us-east-1,us-west-2,eu-west-1
Steps to Add:
- Select Amazon Web Services from the Provider dropdown
- Enter a descriptive Account Name
- Paste your Access Key ID
- Paste your Secret Access Key (input field is hidden for security)
- Select or type your Default Region
- Click Add Account
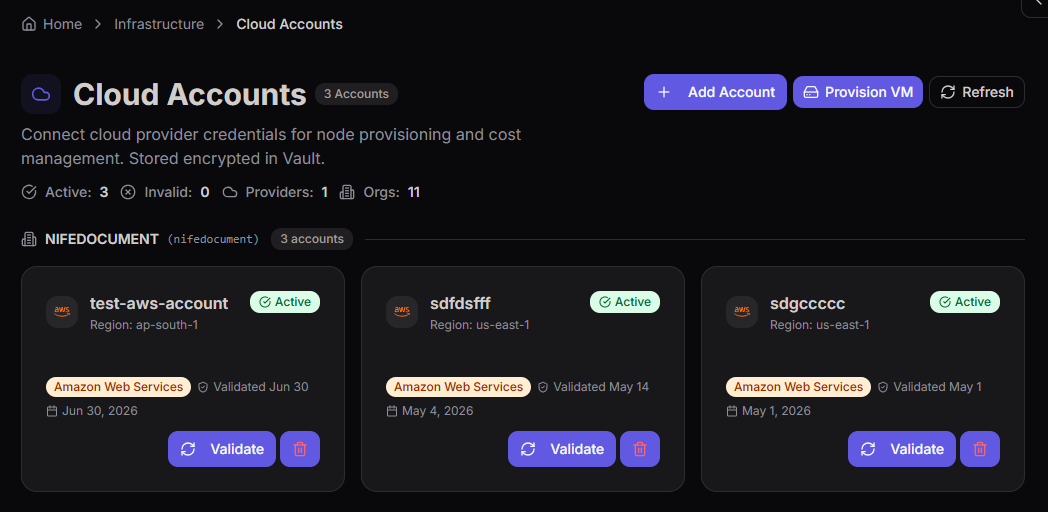 Add Cloud Account dialog with AWS provider selected
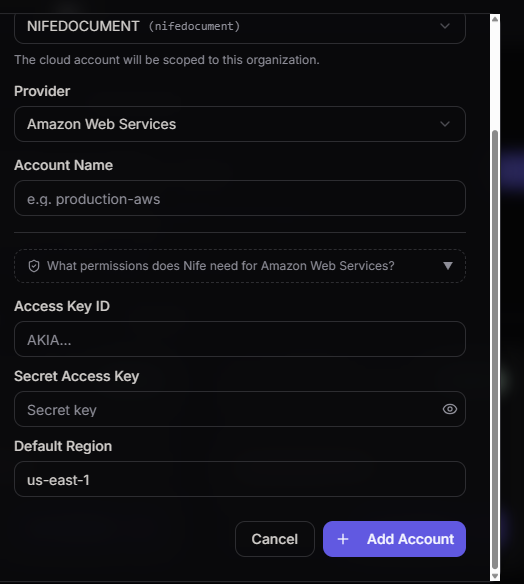
 AWS account form with all required fields including Access Key ID, Secret Access Key, and Default Region
After the account is created, Nife validates the credentials immediately. Valid accounts show an "Active" badge in the Cloud Accounts dashboard. Invalid credentials show as "Invalid" with a red badge.
GCP Account Setup
When Google Cloud Platform is selected as the provider, fill in these fields:
Required Fields:
- Account Name: e.g.,
production-gcp,staging-gcp - Project ID (optional): Your GCP project ID, e.g.,
my-gcp-project - Service Account JSON: Paste the complete service account key JSON
Steps to Add:
- Select Google Cloud Platform from the Provider dropdown
- Enter a descriptive Account Name
- Enter your Project ID (optional, helps with account identification)
- Paste the entire Service Account JSON in the text area
- Click Add Account
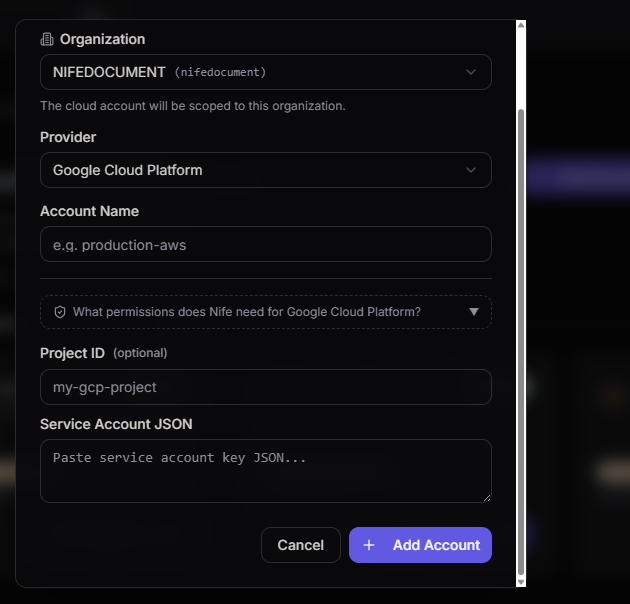
 GCP account form with Project ID and Service Account JSON fields
Paste the complete JSON contents from your GCP service account key file. The JSON must be valid and include all required fields from the download.
Azure Account Setup
When Microsoft Azure is selected as the provider, fill in these fields:
Required Fields:
- Account Name: e.g.,
production-azure,dev-azure - Subscription ID: Your Azure subscription ID (GUID format)
- Tenant ID: Your Azure AD tenant ID (GUID format)
- Client ID: Service principal application ID (GUID format)
- Client Secret: Service principal secret value (stored securely, hidden after input)
Steps to Add:
- Select Microsoft Azure from the Provider dropdown
- Enter a descriptive Account Name
- Enter your Subscription ID (from Azure Subscriptions)
- Enter your Tenant ID (from Azure AD → Properties)
- Enter your Client ID (from App registration)
- Paste your Client Secret (input field is hidden for security)
- Click Add Account
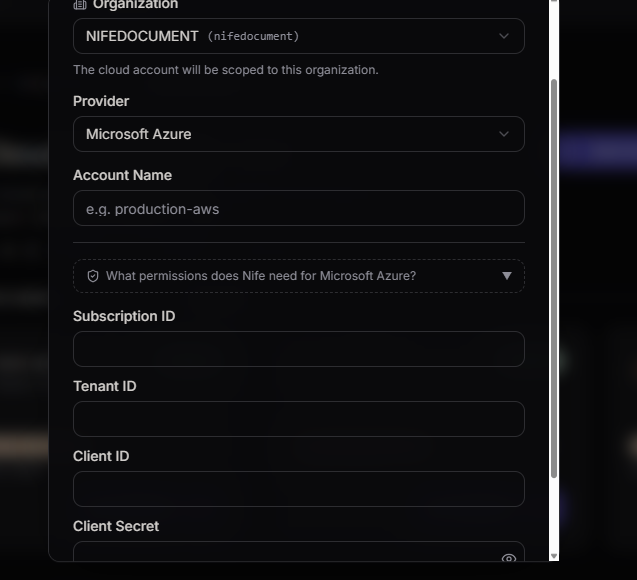
 Azure account form with Subscription ID, Tenant ID, Client ID, and Client Secret fields
Client Secret is only visible once when created in Azure AD. Copy it immediately and store securely before you lose access to it.
OpenShift Account Setup
When OpenShift is selected as the provider, fill in these fields:
Required Fields:
- Account Name: e.g.,
production-ocp,staging-openshift - API URL: Your OpenShift cluster API endpoint, e.g.,
https://api.ocp.example.com:6443 - Bearer Token: Authentication token for cluster access (stored securely, hidden after input)
Optional Fields:
- Kubeconfig: Complete kubeconfig file for cluster authentication (alternative to Bearer Token)
Steps to Add:
- Select OpenShift from the Provider dropdown
- Enter a descriptive Account Name (e.g.,
prod-cluster) - Enter your API URL (the OpenShift cluster API endpoint)
- Paste your Bearer Token (input field is hidden for security)
- OR provide Kubeconfig file content
- Click Add Account
 OpenShift account form with API URL and Bearer Token fields
OpenShift credentials are validated immediately. The connection is tested using the provided API URL and authentication token. Valid accounts show an "Active" badge.
Cloud Accounts Dashboard
Once added, your accounts appear in the Cloud Accounts list with the following information:
Account Card:
- Account Name: The identifying name you provided
- Status Badge:
- Green "Active" if credentials are valid
- Red "Invalid" if credentials failed validation
- Provider: AWS, GCP, Azure, or OpenShift
- Region/Details: Default region (AWS), cluster endpoint (OpenShift), or project info
- Last Validated: When credentials were last verified
- Action Buttons:
- Validate: Re-verify credentials
- Delete: Remove the account
Account Status
Active: Credentials are valid and account is ready to use for VM provisioning
Invalid: Credentials failed validation or have expired. Delete and re-add the account with correct credentials.
Validating Accounts
To verify an account's credentials are still valid:
- Locate the account card in the Cloud Accounts list
- Click the Validate button
- Nife checks if credentials still work
- "Last Validated" timestamp updates
- Status updates to Active or Invalid
Detailed Credential Setup by Provider
Use the sections below as reference for gathering credentials from your cloud provider before adding them to Nife.
AWS Detailed Setup Guide
Prerequisites
- AWS account with billing enabled
- IAM user with appropriate permissions
- EC2 instances already created in your AWS account (for testing)
Step 1: Create IAM User (Recommended)
Instead of using root credentials, create a dedicated IAM user for Nife.
-
Log in to AWS Console
- Go to https://console.aws.amazon.com
- Navigate to IAM → Users
-
Create New User
- Click Create user
- Enter username:
nife-vm-management(or your preference) - Click Next
-
Set Permissions
- Select Attach policies directly
- Search for and attach:
AmazonEC2FullAccess - Optionally: Create custom policy with minimal permissions (see below)
- Click Next
-
Review and Create
- Review user details
- Click Create user
Step 2: Create Access Keys
-
Select the User
- Click on the user you just created
- Go to Security credentials tab
-
Generate Access Key
- Scroll to Access keys section
- Click Create access key
- Select Command Line Interface (CLI)
- Check the confirmation checkbox
- Click Next
-
Save Credentials
- Copy Access Key ID (starts with
AKIA) - Copy Secret Access Key
- Important: Save these securely; you won't see the secret key again
- Download CSV file as backup
- Copy Access Key ID (starts with
-
Complete
- Click Done
AWS IAM Policy (Minimal Permissions)
For security, create a custom policy with only necessary permissions:
{
  "Version": "2012-10-17",
  "Statement": [
    {
      "Effect": "Allow",
      "Action": [
        "ec2:DescribeInstances",
        "ec2:DescribeInstanceStatus",
        "ec2:StartInstances",
        "ec2:StopInstances",
        "ec2:RebootInstances",
        "ec2:DescribeRegions",
        "ec2:DescribeSnapshots",
        "ec2:CreateSnapshot",
        "ec2:DescribeVolumes",
        "ec2:DescribeSecurityGroups"
      ],
      "Resource": "*"
    }
  ]
}
AWS Troubleshooting
Invalid Access Key Error
- Verify Access Key ID format (starts with
AKIA) - Check Secret Key for typos
- Ensure user is not disabled
- Verify user has EC2 permissions
Account Validation Fails
- Confirm credentials are correct
- Check user hasn't been deleted in AWS
- Verify IAM policy is still attached
- Wait 1-2 minutes for IAM changes to propagate
Permission Denied Error
- Verify IAM user has EC2 permissions
- Check if attached policy is active
- Verify access keys are from correct user
- Check user status in AWS console
GCP Detailed Setup Guide
Prerequisites
- Google Cloud Platform account
- Active project with billing enabled
- Compute Engine API enabled
- Existing VM instances in your project (for testing)
Step 1: Enable Compute Engine API
-
Go to Google Cloud Console
-
Select Your Project
- Click project selector at top
- Choose or create a project
-
Enable API
- Go to APIs & Services → Library
- Search for "Compute Engine API"
- Click on it
- Click Enable
-
Wait for Activation
- API activation takes a few moments
- Proceed once enabled
Step 2: Create Service Account
-
Go to Service Accounts
- Navigate to APIs & Services → Credentials
- Click Create Credentials → Service Account
-
Fill Service Account Details
- Service account name:
nife-vm-management(or your choice) - Service account ID: Auto-generated
- Description: "Service account for Nife VM Management"
- Click Create and Continue
- Service account name:
-
Grant Permissions
- Select role: Compute Instance Admin (v1)
- This grants necessary permissions for VM management
- Click Continue
-
Complete Creation
- Click Done
- Service account is now created
Step 3: Create and Download Service Account Key
-
Open Service Account
- Go to APIs & Services → Credentials
- Under "Service Accounts," click on your service account
-
Go to Keys
- Click Keys tab
- Click Add Key → Create new key
-
Select JSON Format
- Choose JSON format
- Click Create
- File automatically downloads (keep it safe)
-
Secure the Key
- Important: This file contains sensitive credentials
- Store it securely
- Never commit to version control
- Don't share with others
GCP Security Best Practices
- Rotate Keys Regularly: Create new keys every 90 days
- Disable Unused Keys: Remove old service account keys
- Monitor Access: Check Cloud Audit Logs
- Use Resource Hierarchy: Organize projects and folders
- Minimal Permissions: Only grant necessary roles
GCP Troubleshooting
Service Account JSON Invalid
- Verify JSON file is valid and not corrupted
- Try downloading the key again from GCP
- Ensure file is complete (should be 1-3 KB)
Account Validation Fails
- Confirm service account has Compute Instance Admin role
- Check project has Compute Engine API enabled
- Verify service account is in correct project
API Not Enabled
- Go to APIs & Services → Library
- Search "Compute Engine API"
- Click Enable if not already enabled
Azure Detailed Setup Guide
Prerequisites
- Microsoft Azure account with active subscription
- Administrator access to Azure AD
- Existing Virtual Machines in your subscription (for testing)
Step 1: Get Subscription and Tenant Information
-
Navigate to Azure Portal
- Go to https://portal.azure.com
-
Find Subscription ID
- Click on Subscriptions (or search for it)
- Copy your Subscription ID (GUID format)
-
Find Tenant ID
- Click on Azure Active Directory
- Click Properties
- Copy Tenant ID (also called Directory ID)
Step 2: Create Service Principal
-
Go to Azure Active Directory
- Click Azure Active Directory in portal
- Click App registrations
- Click New registration
-
Register Application
- Name:
nife-vm-management(or your choice) - Supported account types: "Accounts in this organizational directory"
- Click Register
- Name:
-
Copy Application Credentials
- Copy Application (client) ID
- Copy Directory (tenant) ID
- Save these values
Step 3: Create Client Secret
-
Go to Certificates & secrets
- In your app registration, click Certificates & secrets
- Click New client secret
-
Create Secret
- Description:
nife-vm-management - Expires: Select appropriate duration (24 months recommended)
- Click Add
- Description:
-
Copy Secret
- Immediately copy the secret Value (not ID)
- Important: You won't see this value again
- Save it securely
Step 4: Assign Permissions
-
Go to Subscriptions
- Click Subscriptions
- Select your subscription
-
Access Control (IAM)
- Click Access Control (IAM)
- Click Add → Add role assignment
-
Assign Role
- Role: Search and select "Virtual Machine Contributor"
- Click Next
-
Assign to Service Principal
- Click Members → Select members
- Search for your service principal name (
nife-vm-management) - Click to select it
- Click Select
- Click Review + assign
Azure IAM Role Reference
For VM Management, assign:
- Virtual Machine Contributor: Full VM management
- Virtual Machine Operator: Start/stop/restart only
- Virtual Machine User: Read-only access
Azure Security Best Practices
- Rotate Secrets: Create new secrets every 90 days
- Limit Scope: Assign permissions at resource group level
- Monitor Access: Use Azure Activity Log
- Use Managed Identities: When available instead of secrets
- Enable MFA: For Azure AD accounts
- Review Permissions: Regularly audit role assignments
Azure Troubleshooting
Client Secret Error
- Verify secret value (not ID) is used
- Check secret hasn't expired
- Create new secret if needed
- Ensure secret is copied completely
Subscription Not Found
- Verify subscription ID is correct
- Confirm account has access to subscription
- Check subscription isn't disabled
Permissions Denied
- Verify service principal has Virtual Machine Contributor role
- Check role assignment scope
- Confirm subscription is selected correctly
- Wait 1-2 minutes for IAM changes to propagate
Account Validation Fails
- Re-verify all four credential fields (Subscription ID, Tenant ID, Client ID, Client Secret)
- Check credentials haven't expired or been rotated
- Create new credentials if needed
OpenShift Detailed Setup Guide
Prerequisites
- OpenShift Container Platform (OCP) cluster v4.8 or later
- Administrator access to the cluster
ocCLI installed locally (optional, for verification)
Step 1: Get OpenShift API URL
-
Find Cluster API Endpoint
- From OpenShift Web Console, click your profile (top-right)
- Select Copy login command
- API URL will be displayed in the command
- Format:
https://api.clustername.example.com:6443
-
Alternative - From oc CLI
- If already logged in via oc, run:
oc cluster-info | grep 'Kubernetes master'- Copy the API URL shown
Step 2: Generate Bearer Token
-
From OpenShift Web Console
- Click your profile (top-right corner)
- Select Copy login command
- A new tab opens with your login information
- Copy the token value from the login command
- Format: Long string starting with
sha256~
-
Alternative - From oc CLI
- If already logged in, run:
oc whoami -t- This outputs your current bearer token
- Copy the entire token value
-
Create Service Account Token (Recommended)
- For better security, create a dedicated service account:
# Create namespaceoc create namespace nife-integration# Create service accountoc create serviceaccount nife-sa -n nife-integration# Grant cluster admin roleoc adm policy add-cluster-role-to-user cluster-admin -z nife-sa -n nife-integration# Get the tokenoc serviceaccounts get-token nife-sa -n nife-integration- Copy the token output
Step 3: Verify Cluster Access
Before adding to Nife, verify your credentials work:
# Login to cluster with token
oc login --token=<your-bearer-token> --server=<api-url>

# Check connection
oc cluster-info

# Verify permissions
oc auth can-i create pods --all-namespaces
If these commands succeed, your credentials are valid.
OpenShift RBAC Permissions
Ensure your service account/user has these minimum permissions:
apiVersion: rbac.authorization.k8s.io/v1
kind: ClusterRole
metadata:
  name: nife-vm-management
rules:
- apiGroups: [""]
  resources: ["nodes", "pods", "services"]
  verbs: ["get", "list", "watch"]
- apiGroups: ["apps"]
  resources: ["deployments", "statefulsets"]
  verbs: ["get", "list", "watch"]
- apiGroups: ["batch"]
  resources: ["jobs"]
  verbs: ["get", "list", "watch"]
OpenShift Security Best Practices
- Use Service Accounts: Create dedicated service accounts per integration
- Rotate Tokens: Regenerate tokens periodically
- Limit Permissions: Grant only necessary cluster roles
- Monitor Access: Check OpenShift audit logs
- Network Policies: Restrict cluster access via network policies
- TLS Verification: Ensure SSL/TLS certificate validation enabled
OpenShift Troubleshooting
Invalid API URL
- Verify URL format:
https://api.clustername.com:6443 - Ensure HTTPS protocol (not HTTP)
- Check port number (usually 6443)
- Verify cluster is accessible from Nife
Bearer Token Expired
- Tokens expire after 24 hours by default
- Generate a new token using methods above
- Update account in Nife with new token
Permission Denied
- Verify service account has cluster-admin role
- Check RBAC policies for the service account
- Ensure user/account is not restricted
- Check cluster network policies
Account Validation Fails
- Test with oc CLI first:
oc login --token=<token> --server=<url> - Verify API URL and token are correct
- Check cluster connectivity from Nife
- Ensure certificate is valid (no self-signed cert issues)
General Cloud Provider Security Tips
For All Providers
-
Store Credentials Securely
- Use password managers or vaults
- Never store in code or version control
- Use environment variables for local development
- Enable encryption at rest
-
Audit Access
- Review credential usage logs
- Monitor API calls
- Check for unusual activity
- Set up alerts for critical operations
-
Rotate Credentials
- AWS: Rotate access keys every 90 days
- GCP: Rotate service account keys every 90 days
- Azure: Rotate client secrets every 90 days
- OpenShift: Rotate bearer tokens every 90 days
-
Principle of Least Privilege
- Grant only necessary permissions
- Use custom policies when possible
- Regularly audit and remove unused permissions
- Separate credentials by environment (dev/prod)
-
Enable Multi-Factor Authentication (MFA)
- Protect cloud provider console access
- Use authenticator apps (not SMS when possible)
- Require MFA for sensitive operations
- For OpenShift: Enable OAuth2 with MFA
Next Steps
- Creating VM Instances - Create instances with your configured providers
- Managing VM Instances - Manage your created instances
- Monitoring VM Performance - Monitor instance metrics
Related Resources
- 🛠️ AWS CLI Command Builder — build AWS CLI commands interactively without memorizing syntax
- 🛠️ GCP CLI Command Builder — build Google Cloud CLI commands interactively
- 🛠️ JSON Validator — verify your GCP service account key is well-formed JSON