5 posts tagged with "kubernetes"

View All Tags

Power of Kubernetes and Container Orchestration

Welcome back to our ongoing exploration! Today we'll be exploring containers and container orchestration with Kubernetes.

Container Orchestration platforms have become a crucial aspect of DevOps in modern software development. They bring agility, automation and efficiency.

Before going deep into the topic let's understand some critical concepts and get familiar with some key terms. Whether you are a DevOps pro or a newbie, this journey will help you understand and harness the power of these technologies for faster and more reliable software delivery.

Kubernetes in DevOps

Before moving on to Kubernetes let's first understand the concept of containers.

What are containers?#

Containers are lightweight executable packages that confine an application with all the dependencies ( code, libraries, tools, etc.), crucial for the application's functioning. Containers provide a consistent environment for the software for deployment and testing.

Containers ensure your application runs smoothly regardless of the device and environment. Containers bring predictability and reliability to the software development process. That's why they've become a crucial part of the modern software development landscape.

Now that you've understood the concept of containers. It's time to turn our attention to container orchestration and Kubernetes.

What is Container Orchestration?#

Container orchestration is the management and automation of your containerized applications. As you scale, the management of containers across platforms becomes very difficult manually. This is where container orchestration comes into the picture.

To fully grasp the concept of container orchestration. Here are some key aspects.

Deployment: Container orchestration tools allow you to deploy and manage your container as you need. You can select the number of instances and resources for your container.

Scaling: Orchestration tools automatically manage the workloads and scale up and down whenever needed. Different metrics are analyzed for scaling which include CPU usage, traffic, etc.

Service Discovery: Orchestration tools provide mechanisms that enable communication between containers. This communication is critical, especially in a microservices architecture.

Load balancing: Load balancing is also a crucial aspect. Orchestration tools balance the load by distributing all incoming requests across container instances. This optimizes the application's performance and ensures availability.

Health Monitoring: Container orchestration tools ensure continuous monitoring of containers' health. Different metrics are monitored in real-time to ensure proper functioning. In case of any failure, containers are automatically replaced.

Now that you've understood the concept of containers and got familiar with container orchestration. Let's explore Kubernetes.

Let's start with some basics and background.

Kubernetes Overview:#

Kubernetes also abbreviated as k8s is an open-source container orchestration platform that helps developers manage, scale, and deploy their containerized applications efficiently and reliably. After the rise of containerization in the software development world developers felt the need for a container management platform.

Despite the containers' benefits, managing them manually was a tedious task. As a result, a gap in the market was created. This gap led to the birth of Kubernetes from Google's Internal container management system. Kubernetes made container orchestration efficient and more reliable by bringing automation into it.

As soon as it was released, it spread like wildfire throughout the industry. Organizations adopted Kubernetes for efficient container orchestration.

You've got an overview of Kubernetes. Now let's explore its components.

Kubernetes Architecture:

It's important to explore Kubernetes architecture to understand how Kubernetes manage, scale, and deploy containers behind the scenes. Kubernetes workload is distributed between master nodes and worker nodes.

You might be wondering what are master nodes and worker nodes.

Master nodes handle the bigger picture in the cluster and act as the brains of the architecture. It includes components like the API server, etcd, the scheduler, and the controller manager.

Worker nodes handle the workload in the Kubernetes cluster and act as hands of the architecture. It includes kubelet, container runtime, and kube-proxy.

Now let's explore these master and worker nodes.

Master Nodes:#

API Servers: API servers are the centre point of the Kubernetes control plane. It receives all the requests from users and applications and gives instructions. It's the point of contact in the Kubernetes cluster.

Etcd: Think of it as the memory keeper of the cluster. It stores important information related to the cluster like configurations and metadata. Its consistent distribution nature is essential to maintain the desired state of the cluster.

Scheduler: It's a matchmaker. It matches pods with worker nodes based on resource requirements and constraints. By doing so scheduler optimized resource utilization.

Controller Manager: It manages the state of your cluster. The controller manager has ReplicaSets and deployment controllers at its disposal to ensure pods and other resources align with your specifications. The controller manager ensures that the actual state of your cluster matches the desired state.

Worker Nodes:#

Kubelet: Kubelet manages the worker nodes and communicates with the API server on the condition of pods. It ensures containers in pods are running in the desired state. It also reports different metrics like resource usage and node's status back to the control plane.

Container Runtime: Container runtime runs containers inside pods. Kubernetes supports various container run times. One of the most popular container runtimes is docker and Kubernetes supports it, which launches and manages containers.

Kube Proxy: Kube proxy allows network communication between different resources. It enables pods to communicate with each other and external resources.

Now that you've become familiar with Kubernetes architecture, you can understand the Kubernetes ecosystem easily, Kubernetes manages containerized applications and handles scaling.

Kubernetes Ecosystem:#

Kubernetes ecosystem consists of a vast collection of tools, resources, and projects. These components enhance the capabilities of Kubernetes. As Kubernetes is open source, it evolves continuously due to the contribution of developers.

Here are some components of the ecosystem:

Kubectl and Kubeconfig: These are the most important commands in Kubernetes. Kubectl allows you to manage resources and deploy applications while Kubeconfig allows you to configure files stored in the cluster.

Helm: It is a package manager in Kubernetes. It allows you to manage complex applications. You can define different application components and configurations with Helm.

Operators: These are customer controllers that enhance Kubernetes functionality. They use custom resources to manage complex applications and services in Kubernetes.

There are also other components of the Kubernetes ecosystem which include, CI/CD pipelines, Networking solutions, storage solutions, security solutions, and many more.

That's all for today. Hope you've understood the concept of containerization and role of Kubernetes in orchestration. With its architecture and ecosystem, Kubernetes enhances scalability, fault tolerance, automation, and resource utilization.

We'll be back with another topic till then stay innovative, stay agile. Don't forget to follow. If you liked this story, a clap to our story would be phenomenal.

Launching Your Kubernetes Cluster with Deployment: Deployment in K8s for DevOps

In this article, we'll be exploring deployment in Kubernetes (k8s). The first step will be to dive deep into some basic concepts related to deployment, followed by a deeper dive into the deployment process.

Let's get some basics straight.

What is Deployment in Kubernetes (k8s)?#

cloud gaming services

In Kubernetes, deployment is a high-level resource object that manages application deployment. It ensures applications are in the desired state all the time. It enables you to define and update the desired state of your application, including the number of replicas it should be running on. It also handles updates and rollbacks seamlessly.

To get a better understanding of deployment in Kubernetes let's explore some key aspects.

Replica Sets: Behind the scenes, deployment creates and manages replica sets. Replica sets ensure that the desired number of pods are available all the time. If for some reason a pod gets deleted, it gets replaced by a new one by a replica set.

Declarative Configuration: The desired state of your applications is defined in a declarative manner in deployment. This is done using YAML or JSON files. In these files, you specify information like the number of replicas, deployment strategies, and container image.

Scaling: You can control the scaling of your application from deployment configuration. You can scale it up or down whenever needed. When you change the configuration Kubernetes automatically adds or removes pods.

Version Management: With deployments, you can easily keep track of different versions of your applications. As soon as you make any changes a new version is created. This practice helps you roll back to the previous version anytime in case of any problems.

Self-Healing: The deployment controller automatically detects faulty pods and replaces them to ensure proper functioning.

All the above aspects of Kubernetes deployments make them a crucial tool for DevOps. Now that you've understood the concept of Kubernetes deployment. It's time to get your hands dirty with the practical aspect of deployment.

Hands-On Deployment:#

We've already discussed the importance of declarative configuration. Let's explore how you can create a Kubernetes deployment YAML file. This file is essential for defining the desired state of the application in the cluster.

Specifying Containers and Pods:#

When creating a YAML file you'll have to specify everything related to your application. Let's break it down.

apiVersion and kind: The first step is to specify the API version and application kind. You can do that using apps/v1 and Deployment.

Metadata: It is the name and label you specify for your deployment. Make sure to make it unique with your Kubernetes cluster.

Specs: Now this is the part in the file where you set the desired state of your application.

  • Replicas: This is where you specify the desired number of replicas you want to run your application on. For example, by setting replicas:5 you can create 5 identical pods.
  • Selector: This is where you match the deployment with the pods it manages. You can do that through labels. Define a selector with match labels to select pods based on labels.
  • Template: This is where you define the structure of pods.
  • Metadata: This is where labels are defined to specify the pods controlled by this deployment
  • Spec: In this section, you define containers that make up your application. In this section, you define the name of the container, the image to use, the ports to expose, the environment variable, and the CPU memory usage limit.

Strategy: This is the section where you can define the update strategy for the deployment. If you want to lower the risk of downtime you can specify a rolling update strategy. You can use maxUnavailable and maxSurge to specify how many pods you want during an update.

Deploying your Application:#

cloud application deployment

After the creation of the YAML file, it's time to use it in your Kubernetes cluster for deployment. Let's take a deep dive into the deployment process.

You can deploy your application to the Kubernetes cluster using the kubectl apply command. Here is a step-by-step guide.

Run kubectl apply -f deployment.yaml. This command will instruct Kubernetes to create or update resources defined in the YAML file. Kubernetes will act on the information in the file and will create the mentioned number of pods with the defined configurations.

Once you've used the command you can validate it with Kubectl get pods. This command will give you real-time information about the creation of pods and their state. It gives valuable information about your application deployment.

It's crucial to monitor the deployment progress to ensure proper functioning. For this purpose, you can run commands like kubectl rollout status. This command gives you information about the update status if you've configured your deployment for updates. It provides you with real-time information about the pods successfully rolled out.

There is always room for error. In case you find any errors during monitoring you can inspect individual pods using kubectl describe pod and kubectl logs commands.

That's all for today. Hope this guide helps you increase your proficiency in using Kubernetes as a DevOps tool. If you like this story give us a clap and follow our account for more amazing content like this. We'll be back with new content soon.

How to Containerize Applications and Deploy on Kubernetes

Containerization is a revolutionary approach to application deployment. It allows developers to pack an application with all its dependencies in an isolated container. These containers are lightweight, portable, and self-contained. They act as a mini-universe and provide a consistent environment regardless of the underlying infrastructure. Containerization eliminates the infamous "it works only on my device"

containerization Kubernetes

Containerization ensures applications run consistently from the development laptop to the server. Containerization provides many benefits which include deployment simplicity, scalability, security, and efficiency. Kubernetes is a popular container orchestration platform developed by Google. It provides various tools for automating container deployments.

In this article, we will explore the world of containerization and how Kubernetes takes the concept to the next level. We will introduce Nife Labs, a leading cloud computing platform that offers automated containerization workflows, solving the challenges of deployment, scaling, and management. Read the full article for valuable insights.

Understanding Deployment on Kubernetes#

Kubernetes has its infrastructure to ensure everything runs seamlessly. At the core of Kubernetes exists a master node, which controls everything. The master node is responsible for orchestrating the activities of worker nodes and overseeing the entire cluster. Master nodes act as a conductor, they communicate, manage, deploy, and scale applications inside a container.

Worker nodes are the actual containers that host the applications. These nodes provide all the necessary resources to ensure that the application runs smoothly. These nodes communicate through a cluster network. The cluster network plays a crucial role in ensuring the distributed nature of the applications running on Kubernetes.

Some Key concepts in Kubernetes#

Before moving toward the steps of containerization and deployment on Kubernetes. It is important to get familiar with some key concepts of the Kubernetes ecosystem.

  1. Pods: Smallest deployable unit in Kubernetes is called a pod. It represents a group of one or more containers that are tightly coupled and share the same resources, such as storage volumes and network namespace. Pods enable containers to work together and communicate effectively within the cluster.

  2. Deployments: It defines the desired state of pods that should be running at a specific time. Deployment enables scaling and rollout of new features. It also ensures the application is in perfect condition all the time.

  3. Services: Services provide a stable route for accessing pods. They provide an easy path for clients to access pode instead of complex pod IPs. They make applications available and scalable.

  4. Replication Controllers: Replication controllers ensure the applications are available and fault tolerant. They created desired replicas of pods so they keep running in the cluster. They maintain the health of the pod and manage the life cycle of replicas.

Preparing Your Application for Containerization#

The first step in containerization is preparing your application for containerization. Preparation of containerization consists of three steps which include assessing application requirements and dependencies, Modularizing and decoupling application components, and Configuring the application for containerization.

Kubernetes containerization

Assessing Application Requirements and Dependencies#

It is an important step to determine the necessary components to include in the container. Assess the dependencies of your application. Identify all hardware and software requirements. Make sure to identify all the external dependencies. It will help identify the necessary components to add to the container.

Modularizing and Decoupling Application Components#

Once you have identified all the dependencies of your application, now is the time to divide your application into smaller manageable microservices. Your application consists of several services working together. Breaking down allows for easier scalability, containerization, development, and deployment.

Configuring the Application#

Once you have broken down your application into microservices. It is now time to configure it for containerization.

Defining containerization boundaries: Identify all the components that will run in different containers and make sure each microservice works independently. Define clear boundaries of your container.

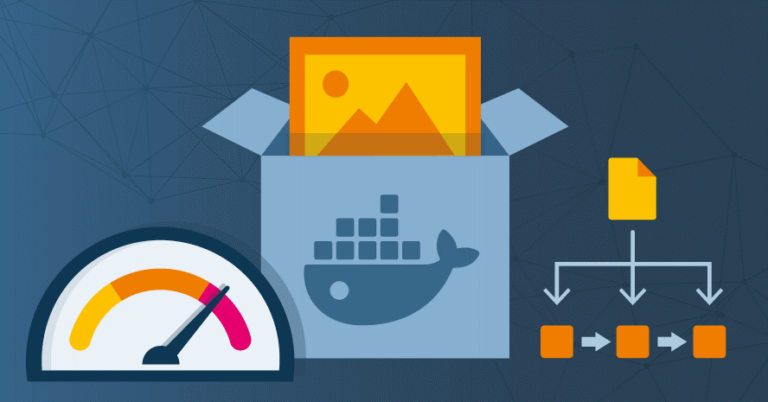
Packaging the application into container images: The container image contains all the necessary components to run your application. Create Dockerfiles or container build specifications that specify the steps to build the container images. Include the required dependencies, libraries, and configurations within these images.

Setting Up a Kubernetes Cluster#

The next phase is setting up Kubernetes clusters. It requires careful planning and coordination. Below are the steps for setting up Kubernetes clusters.

Choosing a Kubernetes deployment model#

Kubernetes offer different deployment models based on the unique needs of businesses. It offers On-premise, cloud, and hybrid deployment models.

  1. On-Premise Deployment: On-premise, Kubernetes cluster can be installed on your physical device. It provides complete security and control over resources.

  2. Cloud Deployment: Cloud platforms provide Kubernetes services. Some examples of these services are Amazon Elastic Kubernetes Service (EKS), Google Kubernetes Engine (GKE), and Microsoft Azure Kubernetes Service (AKS). They simplify cluster management and provide efficiency, high availability, and automated updates.

  3. Hybrid deployment: Kubernetes also offers a hybrid deployment environment where the Kubernetes cluster spans different environments and ensures a consistent experience across all devices.

Installing and configuring the Kubernetes cluster#

Here are the steps involved in installing and configuring the Kubernetes cluster.

  1. Setting Up Master Node: As we discussed earlier master nodes control the entire cluster. Install Kubernetes control panel components to manage and orchestrate the cluster.
  • Adding Worker Nodes: Adding working nodes to your cluster is important because they contain applications and their dependencies. Ensure worker nodes are connected to master nodes.

  • Configuring networking and storage: Kubernetes relies on communication for effective containerization. Configure the network and set up storage that ensures high availability and accessibility.

Deploying Containerized Applications on Kubernetes#

In this phase, you will deploy your containerized applications on Kubernetes. We will explore each step of application deployment.

Defining Kubernetes Manifests#

It is important to define manifest and deployment specifications before the deployment of an application on Kubernetes. Kubernetes manifest is a file that contains all the resources needed for the proper functionality of your application. Whereas deployment ensures all the necessary pods are running at a point in time.

Deploying Applications#

Once you have all the resources that are needed for containerization. It is time to deploy the application. Let's explore the key deployment steps.

First of all, create pods to containerize the applications with their dependencies. Make sure all the resources are allocated. Now create deployments to manage the lifecycle of your applications. Lastly, create services to ensure effective communication of your application.

Once your application is deployed and the demand for your application increases. It is time to adjust the replica count in the deployment specification. Also, implement rollout and rollback features. Rolling out updates with new features and bug fixes allows you to keep your application up to date while maintaining the availability of your application. While rollback allows you to safely switch to the previous version of your application in case of instability.

Managing and Monitoring Containerized Applications#

Managing and monitoring your application is an important part of containerization. It is crucial for their stability, performance, and overall success. In this section, we will explore important aspects of managing and monitoring your containerized application.

Monitoring Performance and Resource Utilization#

Monitoring performance and resource utilization gives important information about your application. Kubernetes have built-in metric collections which can be visualized using tools like Prometheus and Grafana. Monitoring CPU usage, memory consumption, and network traffic gives valuable insights into the application.

Implementing Logging and Debugging#

Implementing a central logging system offers transparency in the application and provides valuable information regarding problems. Tools like Fluentd or Elasticsearch can be used for collecting logging data. Moreover, Kubernetes offers many tools that use logging data for debugging.

Automating Containerization with DevOps as a Service#

DevOps as a Service

DevOps as a Service (DaaS) is a revolutionary approach to containerizing applications. DaaS is a combination of DevOps practices, containerization, and cloud technologies. When it comes to managing and orchestrating your containerized applications, Kubernetes steps in as the ideal platform for implementing DevOps as a Service.

Leveraging Kubernetes as a platform for DevOps as a Service#

Kubernetes with its amazing container orchestration capabilities provides the foundation for DevOps as a Service. It enables developers to automate various stages of building, testing, and deploying applications. Kubernetes offer built-in features that suppers continuous integration and continuous deployment. It can also be integrated with popular CI/CD tools like Jenkins, GitLab, and CircleCI.

Benefits and Challenges of DaaS with Kubernetes#

DevOps as a Service (DaaS) offers several benefits for Kubernetes deployment. Here are some of them.

Streamlined Workflow: One of the important benefits of DaaS is streamlined workflow. It offers reusable components and integration with CI/CD tools and services, making it easier to deploy and manage containerized applications.

Fault tolerance and high availability: Kubernetes offers robust features for application resilience. With features like self-healing and automated pod restarts, Kubernetes ensures that your applications remain highly available even in the face of failures.

Scalability and Automation: Scalability and automation are other benefits of DaaS. These platforms leverage cloud infrastructure which makes it easier for them to scale up or down whenever required. Moreover, you can automate routine tasks in containerization. They help you focus on development and deployment.

Here are some challenges of DevOps as a Service with Kubernetes.

Learning curve: Adopting Kubernetes and implementing DevOps as a Service requires some initial learning and investment in understanding its concepts and tooling. However, with the vast amount of documentation, tutorials, and community support available, developers can quickly get up to speed.

Complexity: Kubernetes is a powerful platform, but its complexity can be overwhelming at times. Configuring and managing Kubernetes clusters, networking, and security can be challenging, especially for smaller teams or organizations with limited resources.

Introducing Nife Labs for Containerization:#

Nife understands the need for simplicity and efficiency in containerization processes. With Nife's powerful features, you can easily automate the entire containerization journey. Say goodbye to the tedious manual work of configuring and deploying containers. With Nife, you can effortlessly transform your source code into containers with just a few clicks.

Auto-dockerize:

Nife simplifies the process of containerizing your applications. You no longer have to worry about creating Dockerfiles or dealing with complex Docker commands. Just drag and drop your source code into Nife's intuitive interface, and it will automatically generate the Docker image for you. Nife takes care of the heavy lifting, allowing you to focus on what matters most鈥攂uilding and deploying your applications.

Seamlessly Convert Monoliths to Microservices:

Nife understands the importance of embracing microservices architecture. If you have a monolithic application, Nife provides the tools and guidance to break it down into microservices. With its expertise, Nife can assist you in modularizing and decoupling your application components, enabling you to reap the benefits of scalability and flexibility that come with microservices.

Integration with Popular CI/CD Tools for Smooth Deployments:

Nife integrates seamlessly with popular CI/CD tools like Jenkins, Bitbucket, Travis CI, and GIT actions, streamlining your deployment process. By incorporating Nife into your CI/CD pipelines, you can automate the containerization and deployment of your applications, ensuring smooth and efficient releases.

Benefits of Using Nife for Containerization#

Faster Deployment and Effective Scaling: With Nife's automation capabilities, you can significantly reduce the time and effort required for containerization and deployment. Nife enables faster time-to-market, allowing you to stay ahead in the competitive software development landscape. Additionally, Nife seamlessly integrates with Kubernetes, enabling efficient scaling of your containerized applications to handle varying workloads.

Simplified Management and Ease of Use: Nife simplifies the management of your containerized applications with its user-friendly interface and intuitive dashboard. You can easily monitor and manage your deployments, view performance metrics, and ensure the health of your applications鈥攁ll from a single centralized platform.

Visit Nife Company's website now to revolutionize your containerization process and experience the benefits of automated workflows.

Conclusion#

In conclusion, Kubernetes offers a transformative approach to development and deployment. By understanding the application, selecting the right strategy, and leveraging Kubernetes manifest, we achieve scalability, portability, and efficient management.

Nife Company's automated containerization workflows further simplify the process, enabling faster deployment, efficient scaling, and seamless migration. Embrace the power of containerization, Kubernetes, and Nife to unlock the full potential of your applications in today's dynamic technological landscape.

How To Implement Containerization In Container Orchestration With Docker And Kubernetes

Kubernetes and Docker are important implementations in container orchestration.

Kubernetes is an open-source orchestration system that has recently gained popularity among IT operations teams and developers. Its primary functions include automating the administration of containers and their placement, scaling, and routing. Google first created it, and in 2014, Google gave it to Open Source. Since then, the Cloud Native Computing Foundation has been responsible for its maintenance. Kubernetes is surrounded by an active community and ecosystem that is now in the process of development. This community has thousands of contributors and dozens of certified partners.

What are containers, and what do they do with Kubernetes and Docker?#

Containers provide a solution to an important problem that arises throughout application development. When developers work on a piece of code in their local development environment, they are said to be "writing code." The moment they are ready to deploy that code into production is when they run into issues. The code, which functioned well on their system, cannot be replicated in production. Several distinct factors are at play here, including different operating systems, dependencies, and libraries.

Multiple containers overcame this fundamental portability problem by separating the code from the underlying infrastructure it was executing on. This allowed for more flexibility. The developers might bundle up the program and all the bins and libraries required to operate properly and store them in a compact container image. The container may be executed in production on any machine equipped with a containerization platform.

Docker In Action#

Docker makes life a lot simpler for software developers by assisting them in running their programs in a similar environment without any complications, such as OS difficulties or dependencies because a Docker container gives its OS libraries. Before the advent of Docker, a developer would submit code to a tester; but due to a variety of dependency difficulties, the code often failed to run on the tester's system, despite running without any problems on the developer's machine.

Because the developer and the tester now share the same system operating on a Docker container, there is no longer any pandemonium. Both of them can execute the application in the Docker environment without any challenges or variations in the dependencies that they need.

Build and Deploy Containers With Docker#

Docker is a tool that assists developers in creating and deploying applications inside containers. This program is free for download and can be used to "Build, Ship, and Run apps, Anywhere."

Docker enables users to generate a special file called a Dockerfile. The Dockerfile file will then outline a build procedure, creating an immutable image when given to the 'docker build' command. Consider the Docker image a snapshot of the program with all its prerequisites and dependencies. When a user wishes to start the process, they will use the 'docker run' command to launch it in any environment where the Docker daemon is supported and active.

Docker also has a cloud repository hosted in the cloud called Docker Hub. Docker Hub may act as a registry for you, allowing you to store and share the container images that you have built.

Implementing containerization in container orchestration with Docker and Kubernetes#

Kubernetes and docker

The following is a list of the actions that may be taken to implement containerization as well as container orchestration using Docker and Kubernetes:

1. Install Docker#

Docker must initially be installed on the host system as the first step in the process. Containers may be created using Docker, deployed with Docker, and operated with Docker. Docker containers can only be constructed and operated using the Docker engine.

2. Create a Docker image#

Create a Docker image for your application after Docker has been successfully installed. The Dockerfile lays out the steps that must be taken to generate the image.

3. Build the Docker image#

To create the Docker image, you should use the Docker engine. The program and all of its prerequisites are included in the picture file.

4. Push the Docker image to a registry#

Publish the Docker image to a Docker registry, such as Docker Hub, which serves as a repository for Docker images and also allows for their distribution.

By Kubernetes#

1. Install Kubernetes#

The installation of Kubernetes on the host system is the next step to take. Containers may be managed and orchestrated with the help of Kubernetes.

2. Create a Kubernetes cluster#

Create a group of nodes to work together using Kubernetes. A collection of nodes that collaborate to execute software programs is known as a cluster.

3. Create Kubernetes objects#

To manage and execute the containers, you must create Kubernetes objects such as pods, services, and deployments.

4. Deploy the Docker image#

When deploying the Docker image to the cluster, Kubernetes should be used. Kubernetes is responsible for managing the application's deployment and scalability.

5. Scale the application#

Make it as large or as small as necessary using Kubernetes.

To implement containerization and container orchestration using Docker and Kubernetes, the process begins with creating a Docker image, then pushing that image to a registry, creating a Kubernetes cluster, and finally, deploying the Docker image to the cluster using Kubernetes.

Kubernetes vs. Docker: Advantages of Docker Containers#

Kubernetes and docker containers

Managing containers and container platforms provide various benefits over conventional virtualization, in addition to resolving the primary problem of portability, which was one of the key challenges.

Containers have very little environmental impact. The application and a specification of all the binaries and libraries necessary for the container to execute are all needed. Container isolation is performed on the kernel level, eliminating the need for a separate guest operating system. This contrasts virtual machines (VMs), each with a copy of a guest operating system. Because libraries may exist across containers, storing 10 copies of the same library on a server is no longer required, reducing the required space.

Conclusion#

Kubernetes has been rapidly adopted in the cloud computing industry, which is expected to continue in the foreseeable future. Containers as a service (CaaS) and platform as a service (PaaS) are two business models companies such as IBM, Amazon, Microsoft, Google, and Red Hat use to market their managed Kubernetes offerings. Kubernetes is already being used in production on a vast scale by some enterprises throughout the globe. Docker is another incredible combination of software and hardware. Docker is leading the container category, as stated in the "RightScale 2019 State of the Cloud Report," due to its huge surge in adoption from the previous year.

Should you optimize your Docker container?

This blog explains the reasons for Docker container optimization and responds to the question "Should you optimize your Docker container?"

Docker container optimization

How Docker Works?#

Docker is a leading containerization industry standard that aids in the packaging and distribution of programs in the most efficient manner feasible. Containers are a convenient approach to transporting software to various environments. They assist you in packaging your code with your desired environment settings and other platform-dependent parameters so that it may be quickly instantiated on other computers with little setup overhead [(Potdar et al., 2020)].

Simply put, Docker is an open-source solution that aids in the management of the containers we just covered. Docker, like containers, is platform-independent, as it supports both Windows and Linux-based platforms.

Docker container and cloud computing

The Kubernetes vs. Docker debate#

When stated as a "both-and" issue, the distinction between Kubernetes and Docker becomes clearer. The truth is that you don't have to choose鈥擪ubernetes and Docker are fundamentally different technologies that complement each other effectively for developing, deploying, and [scaling containerized applications].

Kubernetes and Docker collaborate. Docker is an open standard for containerizing and delivering software. Docker allows you to construct and execute containers as well as store and distribute container images. A Docker build can be simply executed on a Kubernetes cluster, but Kubernetes is not a comprehensive solution. Implement extra tools and services to handle security, governance, identity, and access, as well as continuous integration/continuous deployment (CI/CD) processes and other DevOps principles, to optimize Kubernetes in production [(Shah and Dubaria, 2019)].

Docker List Containers#

To list docker containers, use the commands 'docker container ls' or 'docker ps'. Both commands use the same flags since they both act on the same item, a container. It includes many parameters to achieve the result we want because it only shows operating containers by default. The command 'docker ps' is shorter and easier to type.

What Causes Docker Performance Issues?#

Docker is a sophisticated system that is affected by a variety of circumstances, including host settings and network quality. The following are some of the most prevalent causes of Docker slowness:

  • Inadequate Resource Allocation
  • Docker Image Sizes
  • Size of Docker File Context
  • Docker's default configuration is still in use.
  • Latency in the network

How to Optimize Docker Containers?#

There are several ways to make Docker run quicker:

Appropriate Resource Allocation#

The host machine's performance has an impact on the container's performance. A sluggish CPU or inadequate RAM might create a bottleneck, causing Docker's performance to suffer [(Sureshkumar and Rajesh, 2017)].

Docker Image Optimization#

Examine the Dockerfile for the image and ensure that the file context is not too huge. The context contains a list of the files required by Docker to construct a container.

Examine the Dependencies#

Debian-based Docker images may create extra binaries and files while installing dependencies. Some of these interdependencies are not required for the container's usual operation and can be eliminated.

Consider Using Microservice Architecture#

Monolithic programs are typically slower than microservice-architected apps. If your Docker containers are struggling to operate, it might be because the app within the container is too large [(Wan et al., 2018)]. When the app is migrated to microservices, the workload may be distributed among several containers.

Make use of Dedicated Resources#

Hosting containers on the dedicated hardware of Bare Metal Cloud minimizes virtualization overhead and increases container performance. Containerized programs do not share system resources like RAM and CPU, which reduces latency and allows apps to fully exploit hardware.

Use a light operating system#

Building images using a lightweight system can save up to 100 MB of the final image size, resulting in much faster performance.

Dockerfile Layers Cache#

Layer caching can help you produce images faster. When Docker begins constructing an image, it searches the cache for layers with similar signatures and utilizes them [(Liu et al., 2018)]. This feature expedites the construction process.

Dockerfile Layers

Docker for Windows#

Docker containers initially only supported Linux operating systems. Docker may now operate natively on Windows, eliminating the requirement for Linux support. Instead, the Docker container will run on the Windows kernel itself, and the whole Docker tool set is now compatible with Windows. The Docker CLI (client), Docker compose, data volumes, and the other building pieces for Dockerized infrastructure are now Windows-compatible.

Conclusion#

Docker Container optimization is critical for overall performance. As more applications migrate to containerization, it is critical to maintaining them up to date on best practices. Otherwise, you risk losing some of the important advantages Docker has over traditional methods of software delivery, which would defeat the point of using Docker containers in the first place.